Join Our Ford Truck Forum Today

Document your Ford truck project here and inspire others! Login/Register to view the site with fewer ads.

NO heat!!! thermostat?

A few more photos:

Image #5:
NUMBER5.jpg


Image #6:
Number6.jpg


Image #7:
Number7.jpg


/
 
973
11
Ok.. sooo, put in the new t-stat today.. no difference... thought i couldnt move the temp control knowb all the way but it does have full movement as it normally did...

now my truck use to make a "trickle" noise where the core is, doesnt do it anymore... soo im guessing the core is bad?

ALSO,, had a 20 min drive to work this morning.. very cold.. 5deg.. anyways.. poped the hood wen i got to the shop and felt the lines... the top rad hose was hot.. BOTH core lines were NOT hot.. only warm from engine heat.. now i also fear i have a blockage.. how do i test for that?
 
973
11
what year are those pics from? mine doesnt look like that really...

0117091534.jpg


is this something i can do now if i really want to freeze my ass off?
 
973
11
ok.. send line to core is hot, return is cold... heater core correct?

now i need to know how to do this
 

Skandocious

Post Whores Make Me Sick
19,076
655
California
Yup, sounds like your core is plugged. Remove it and blast it out with high pressure. A pressure washer should work just fine.

You might also want to run some solvent through it too, to break up the crud.

When you're done, shoot some water through it before you install, to make sure that you get the same amount of flow OUT that you're putting IN.
 
973
11
bought a new core.. lol.. 22.50.. what i need to know is HOW to do it
 

Skandocious

Post Whores Make Me Sick
19,076
655
California
From my Ford Shop Manual:


Heater Core
Removal

Allow the engine to cool. Observe the safety precautions in Section 03-03 .

Place a thick cloth over the radiator cap. Turn the cap slowly to its first stop to release system pressure. When the pressure has been released, tighten the radiator cap.

Disconnect the heater water hoses (18472) from the heater core (18476). Plug the hoses.

Remove the glove compartment.

From inside the passenger compartment, remove the seven screws that attach the heater core cover (18B300) to the heater air plenum chamber (18471).

Disconnect the vacuum source. Leave the A/C plenum vacuum harness (18C581) attached to the heater core cover. Remove the heater core cover.

Remove the heater core from the heater air plenum chamber.


stjusenfilem3151bgifgencb1.gif


Item------Part Number--------Description
1-----------18B300--------Heater Core Cover
2------------18476----------Heater Core
3--------------------Heater Core Tubes (Part of 18476)
4-----------18596----Heater Core Tube to Cowl Gasket
5-----------18471------Heater Air Plenum Chamber
6----------18A318--Vacuum Control Motor (Floor/Defrost)
 
Last edited:
973
11
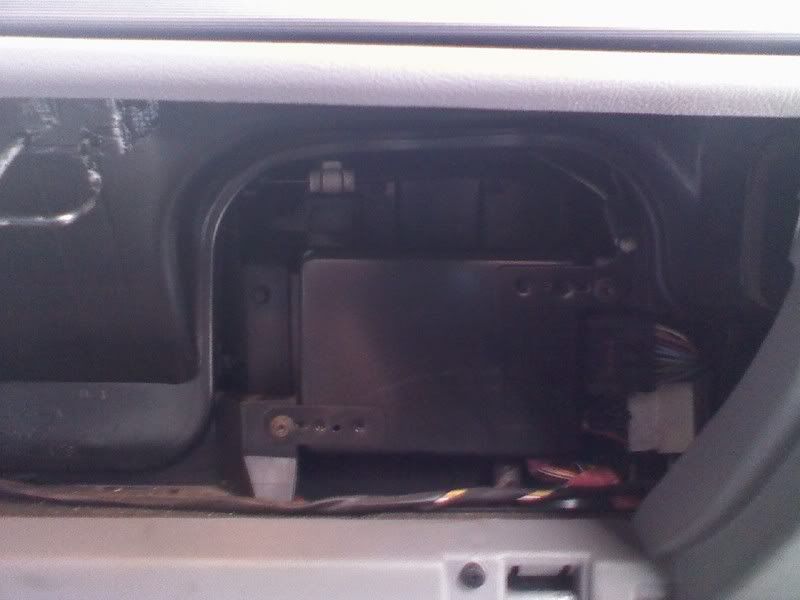
ugg... look at the picture i took.. doesnt look like the pics subford took...
 

Skandocious

Post Whores Make Me Sick
19,076
655
California
Not sure Brian... I was just headed outside to remove my glovebox and take a look but my damned truck is at Trista's house :headbang:
 

Skandocious

Post Whores Make Me Sick
19,076
655
California
Brian there's another section in my manual that has a slightly different set of instructions... Check this out:

Heater Core
Removal

Allow the engine (6007) to cool. Then, observing the safety precautions in Section 03-03 , proceed as follows.

Place a thick cloth over the radiator cap.

Turn the cap slowly to its first stop to release system pressure.

When the pressure has been released, tighten the radiator cap.

Disconnect the heater water hoses (18472) from the heater core (18476), and plug the heater water hoses.

For easier access, remove the glove compartment.

From inside the passenger compartment, remove the seven screws that attach the heater core cover (18B300) to the heater air plenum chamber (18471).[highlight] It will be necessary to move a RABS module out of the way on F-Series prior to removing the cover. [/highlight]

Disconnect the vacuum source. Leave the vacuum hose harness (19C827) attached to the cover. Remove the cover.

Remove the heater core from the heater air plenum chamber.


Judging from that big wiring harness on the right hand side of the photo you took... Sounds like you might be looking at your RABS module when you take the glovebox out.
 
973
11
yehp, sounds about right lol... i do have RABS.....

so i assume its a messy job too... ugg... mayb i can go to the garage monday and do it.. just got a new core from Pepboys
 
All the photos are showing the same item (mine, yours and Skandocious).
You just need to remove the Anti-Lock Brake Module (The box blocking your view) and follow Skandocious instructions.
 
973
11
ok cool.. much appreciated for all the help... looks like this is a perfect opurtunity to make a tutorial lol.. if only it wasnt 4 degrees out...
 
973
11
whats up guys.. i have heat again! and better than ever!!

didnt get to take anypictures.. but new core went in nicely!
 

95F350XL

Master Junk Tech
Sweet man, did you flush out ur system, to keep it from regunkin up?
 
973
11
it was actually VERY easy.. heres some instructions! Yes i wrote it, just put it in the (code)(/code) format

Code:
1) Remove the glove compartment.

2) Remove the RABS module (two Torx 15 screws) and then disconnect the harness 
from it. 

3) Theres another box next to the RABS, pull it DOWN and off the metal tabs
 and out of the way, careful not to bend the tabs, very soft metal.

4) Remove the 6 8MM screws from the core cover. 

5)Release the vaccum lines from the cover, one on the bottom and right side of 
cover, CAREFULLY place the line(s) to the side.

6) Gently pull the cover away from the core, you will need to release the blend 
door cable from the cover, there is a tab you push from behind to 
release it.

7) Once the cover is removed, disconnect the send/return lines from the 
core located under the hood.
 
8) Pull the old core out, put the new one in (or unplug your existing one)
 connect the lines and replace the cover, fasten it, attach cable and 
vaccum lines, replace the module on the metal tabs, and re attach 
the RABS module.

DONE!

To add to it, make sure you replace the foam gasket to prevent the core from bouncing around. and also, you will want to reconnect the send/return lines **BEFORE** you re-attach the cover incase the core gets pushed back when attaching the lines.


And yes, i did flush my system to ensure there are no metal shavings from anything floating around.. did it twice actually.. for the tstat install and drained about half for the core..

all in all, it takes about an hour.. me and hour and a half cause i wanted for the glue to dry on the foam gasket.
 
973
11
I also got a copper core.. so i think it retains the heat better than a aluminum.. if i remember my metal properties lol
 

95F350XL

Master Junk Tech
Sweet, glad it worked out for ya.
 

Ford Truck Articles

Recent Forum Posts

Top