Join Our Ford Truck Forum Today

Document your Ford truck project here and inspire others! Login/Register to view the site with fewer ads.

How to not buy a truck off craigslist.

First off, this forum has been the most knowledgeable and informative specific to 6th gen Ford trucks.This is my first post, and I would like to share my extremely abridged build of one my favorite trucks.

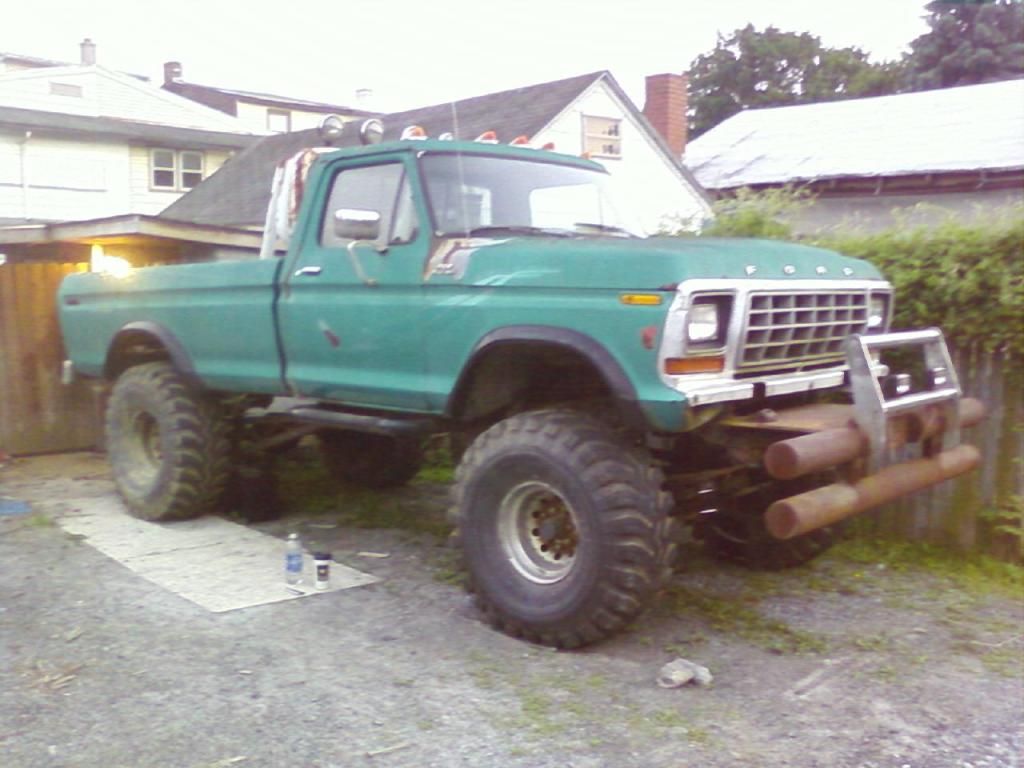
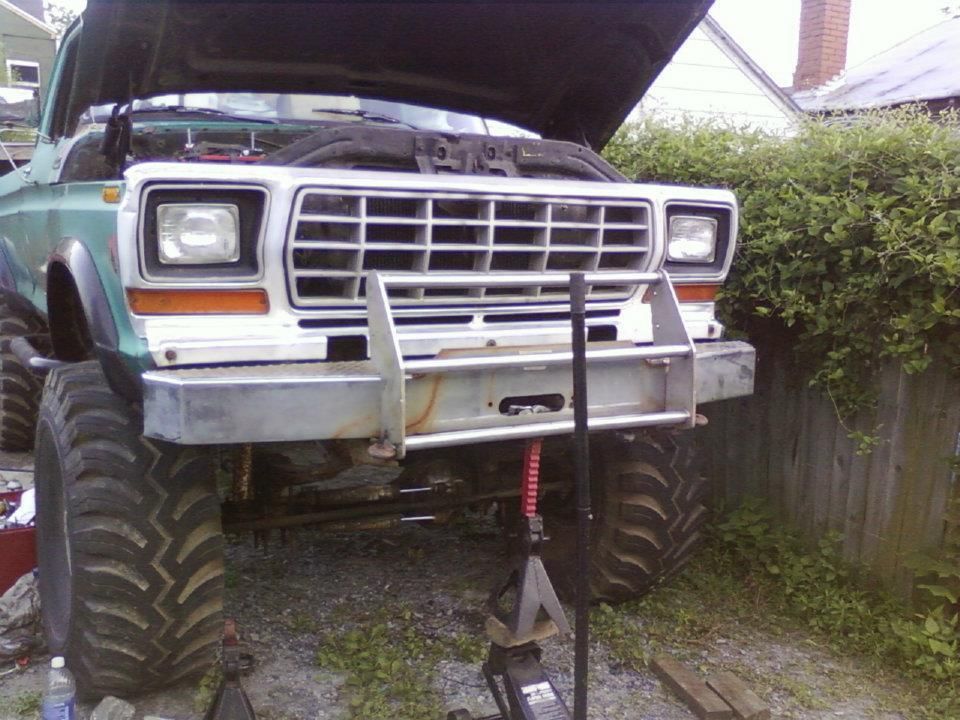
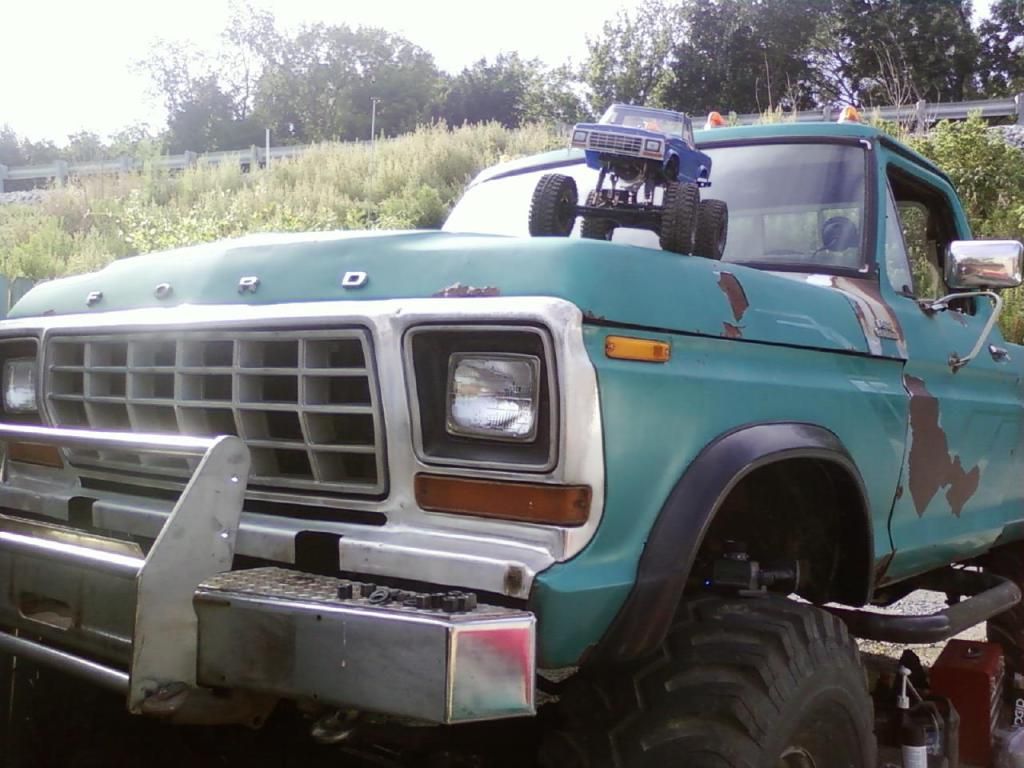
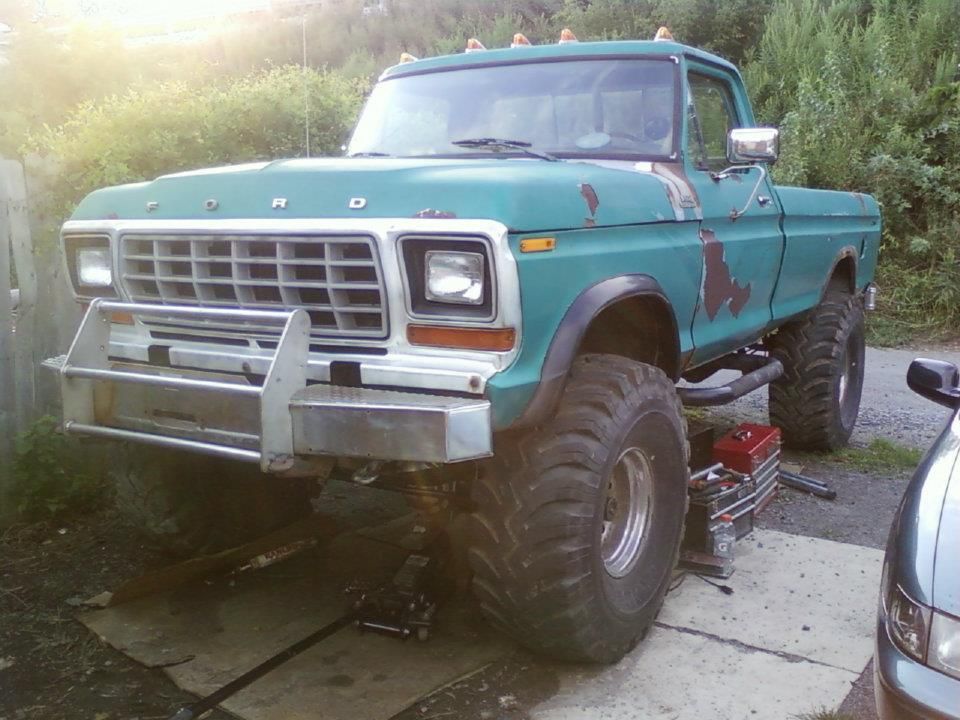
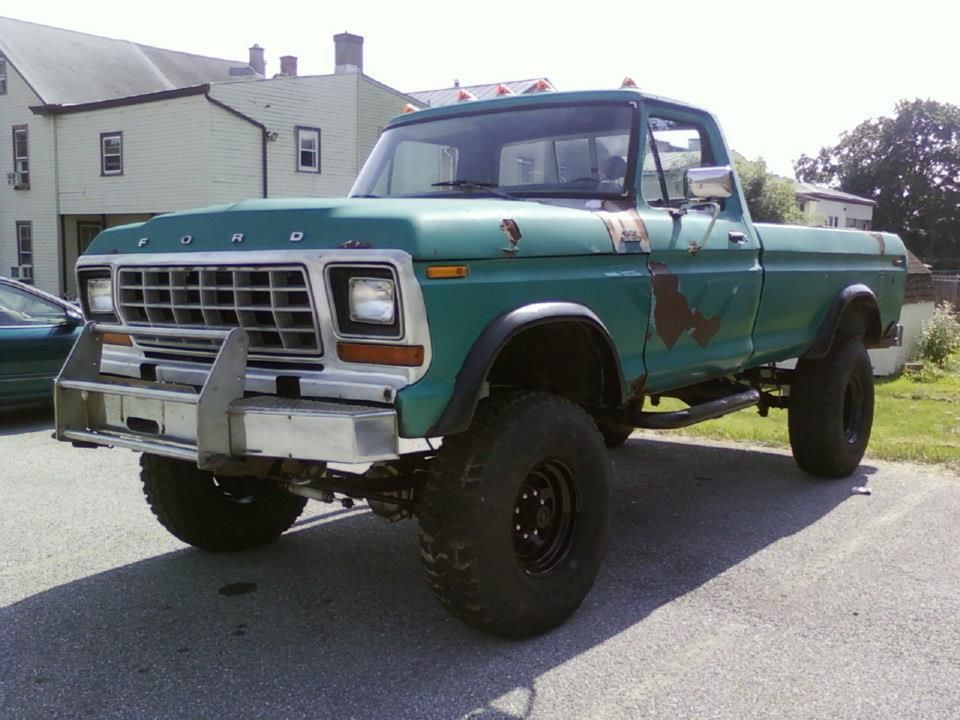
Here it is, the day it was delivered:
537492_748887496956_179354850_n.jpg


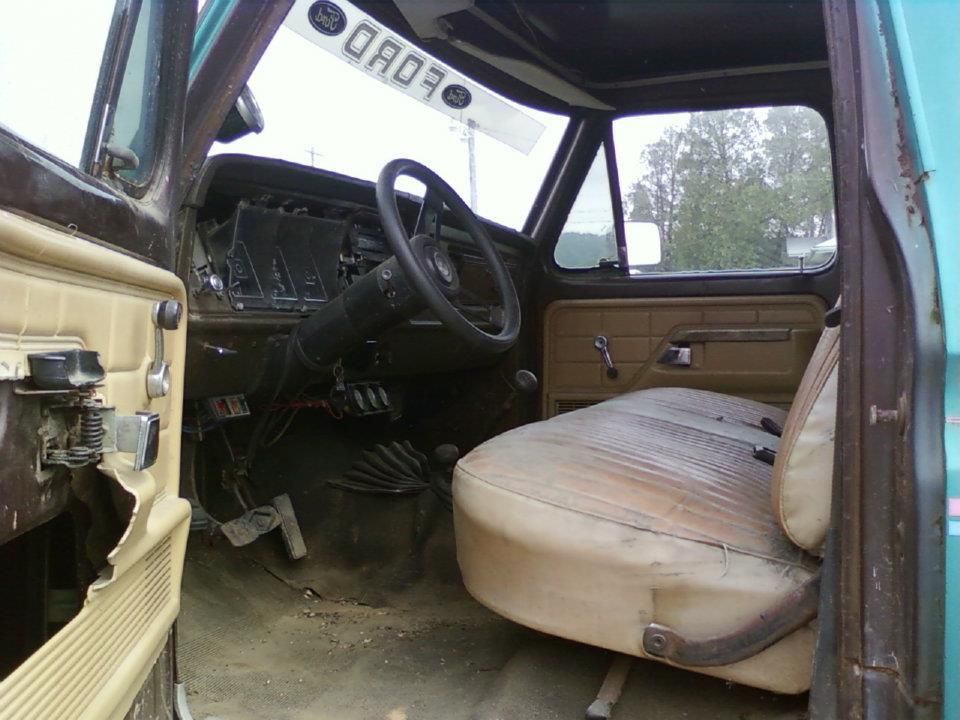
What was left of the interior:
535234_748889063816_509129238_n.jpg


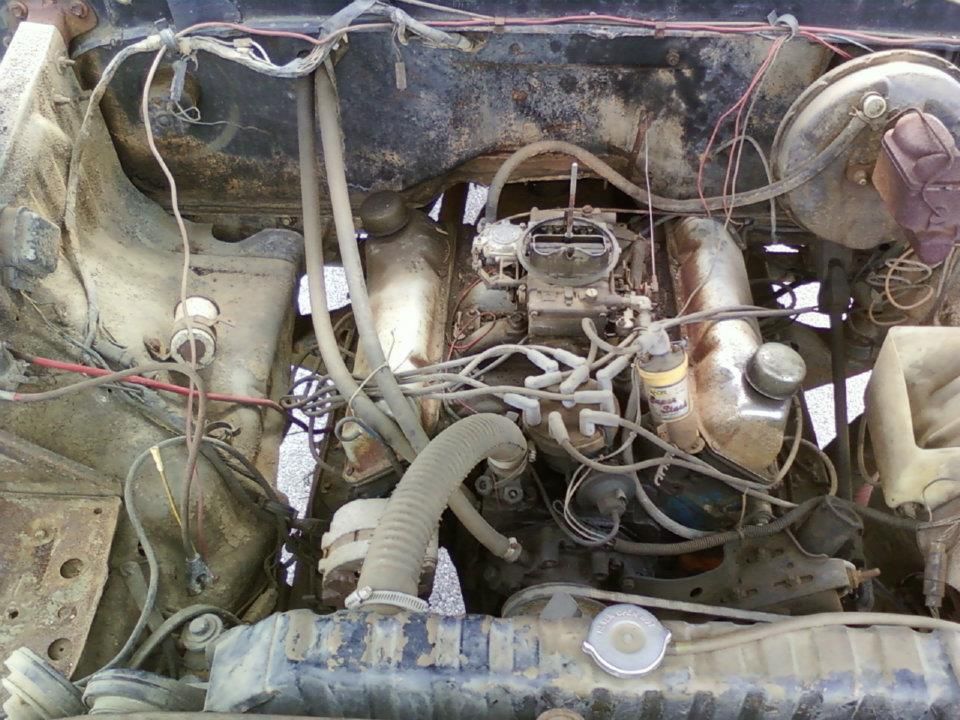
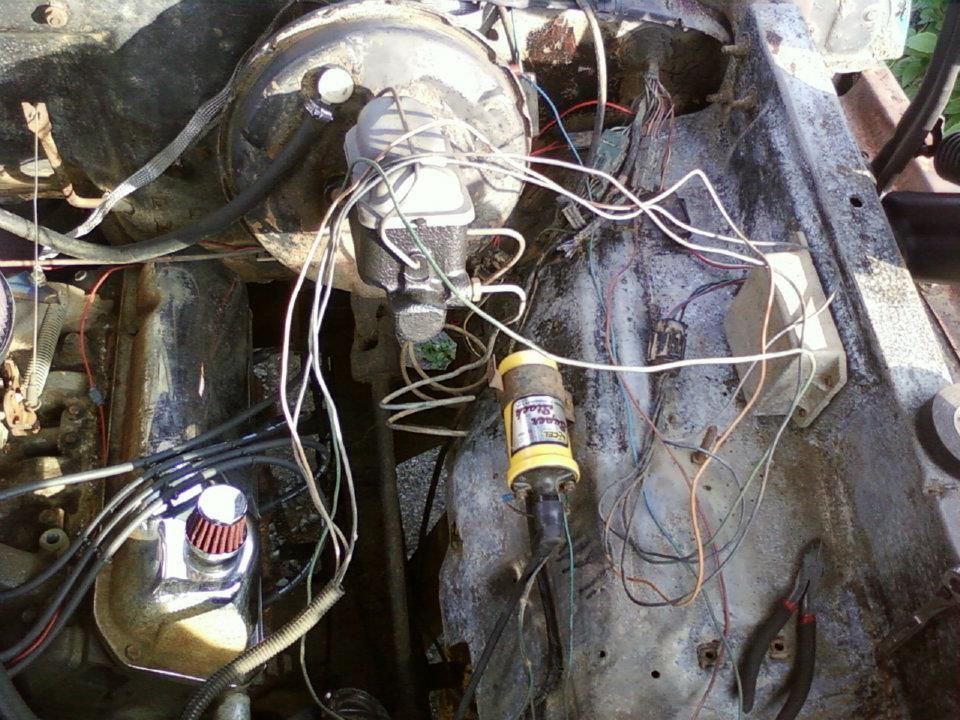
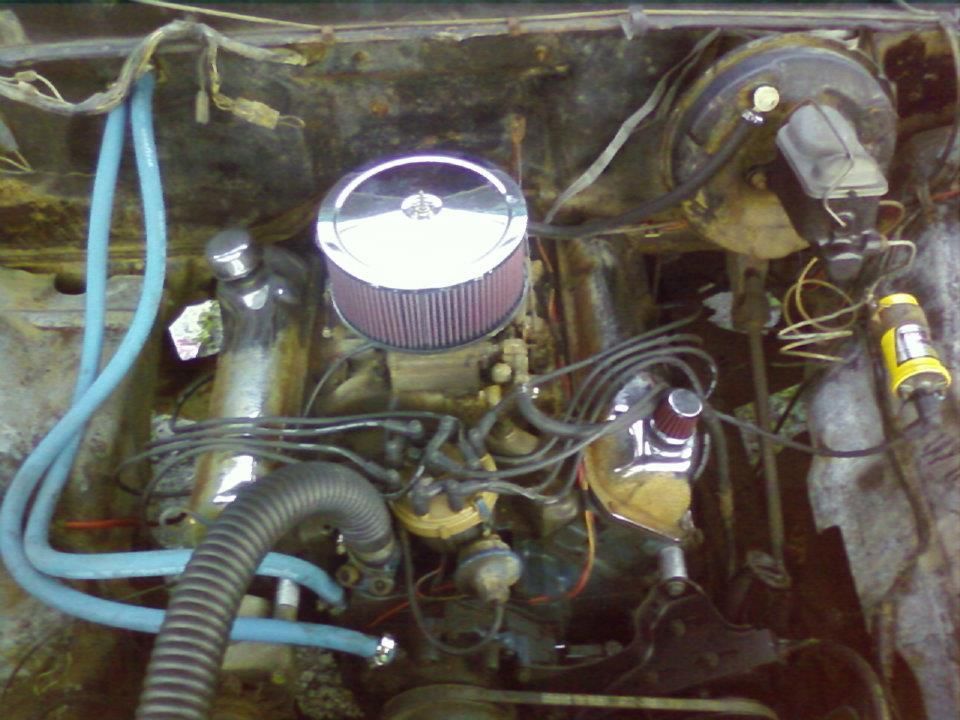
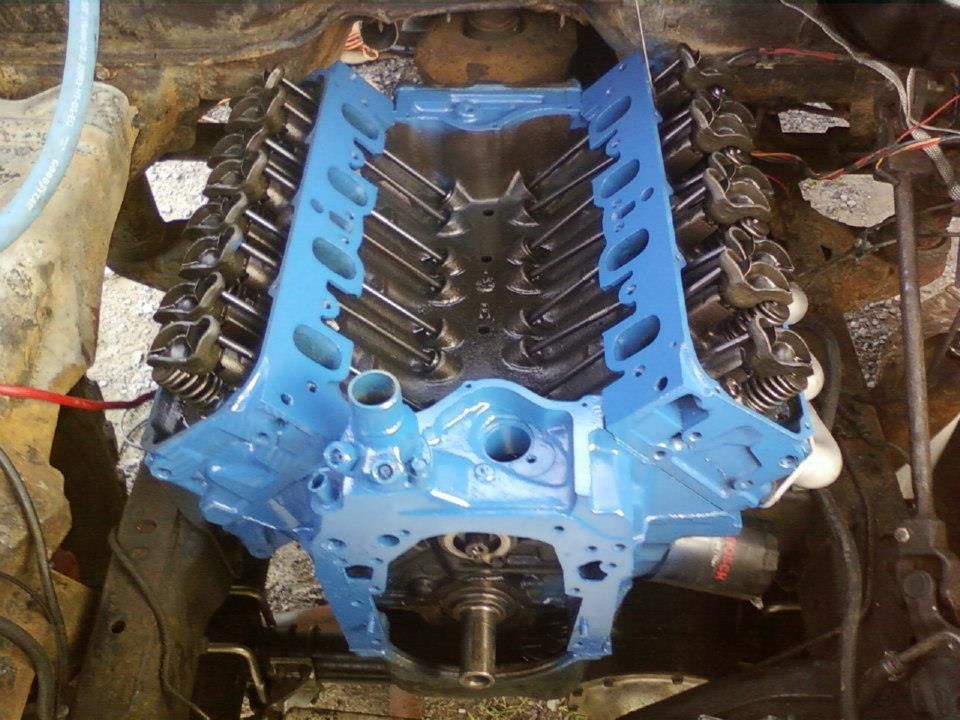
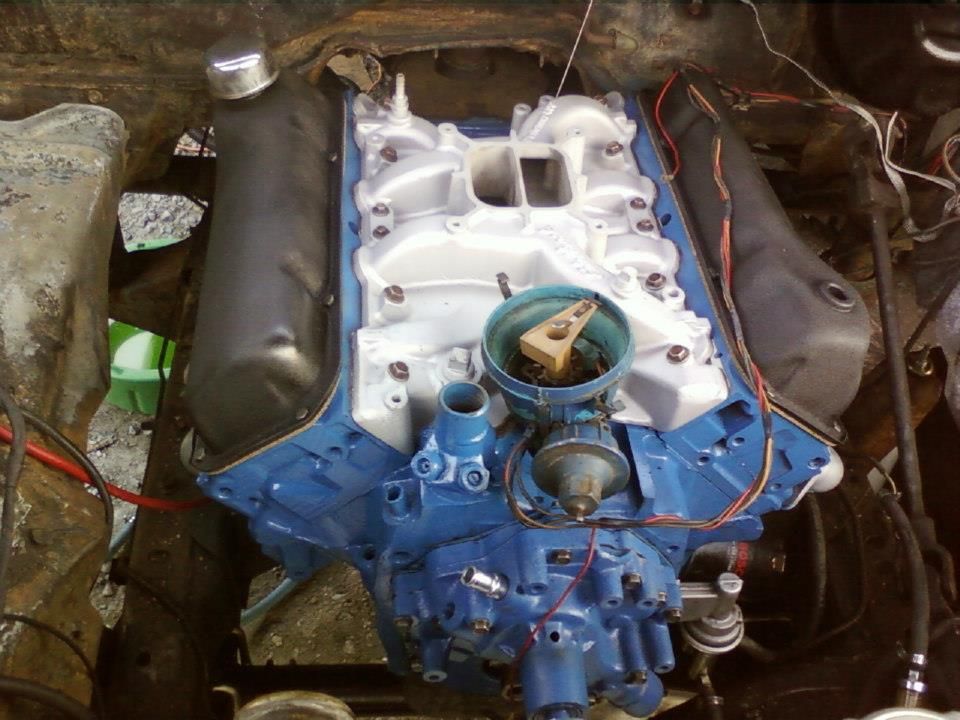
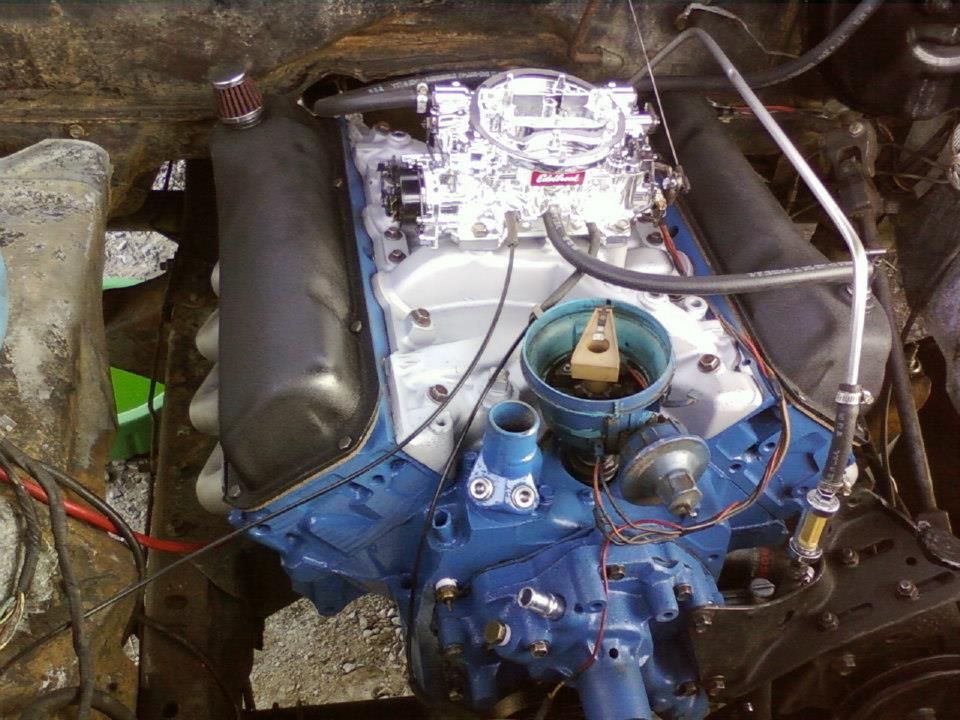
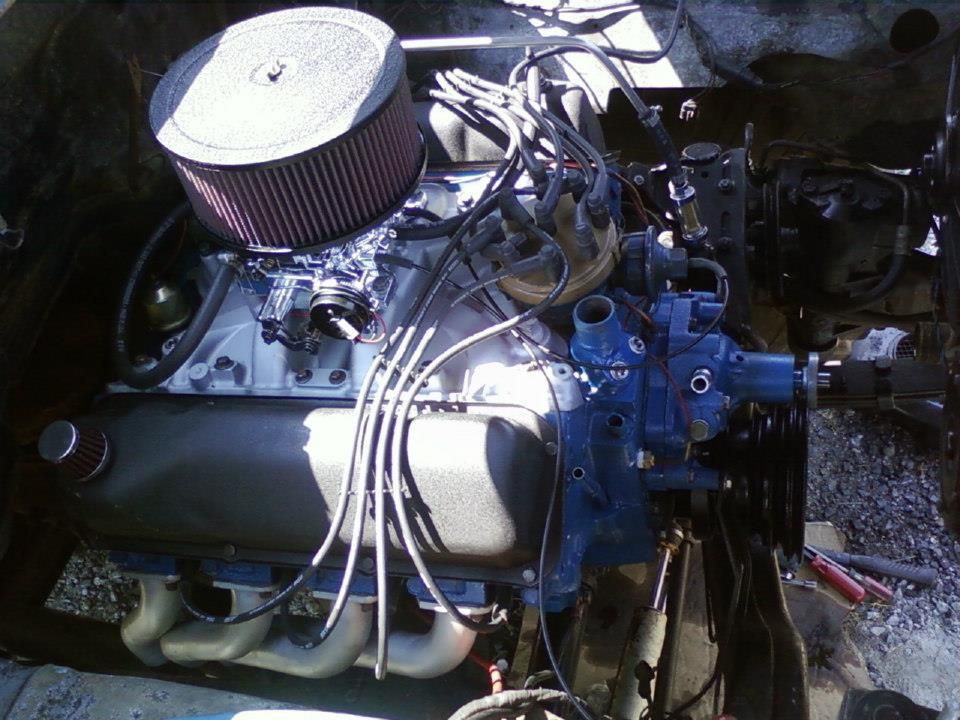
The mighty 6.6L 351M400, which ran:
582276_748889083776_509206590_n.jpg


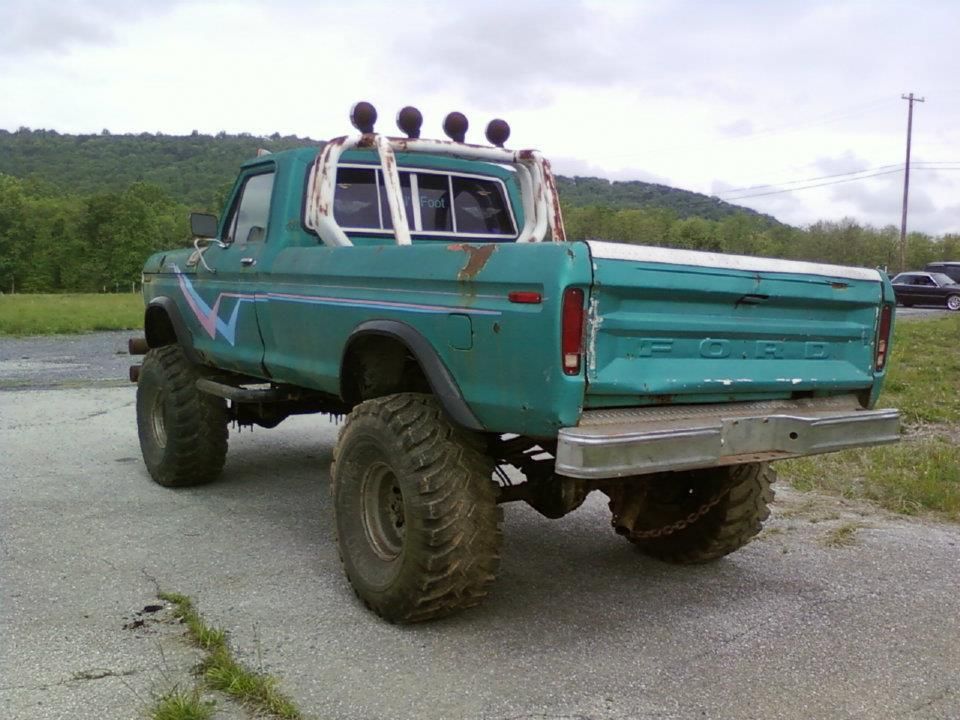
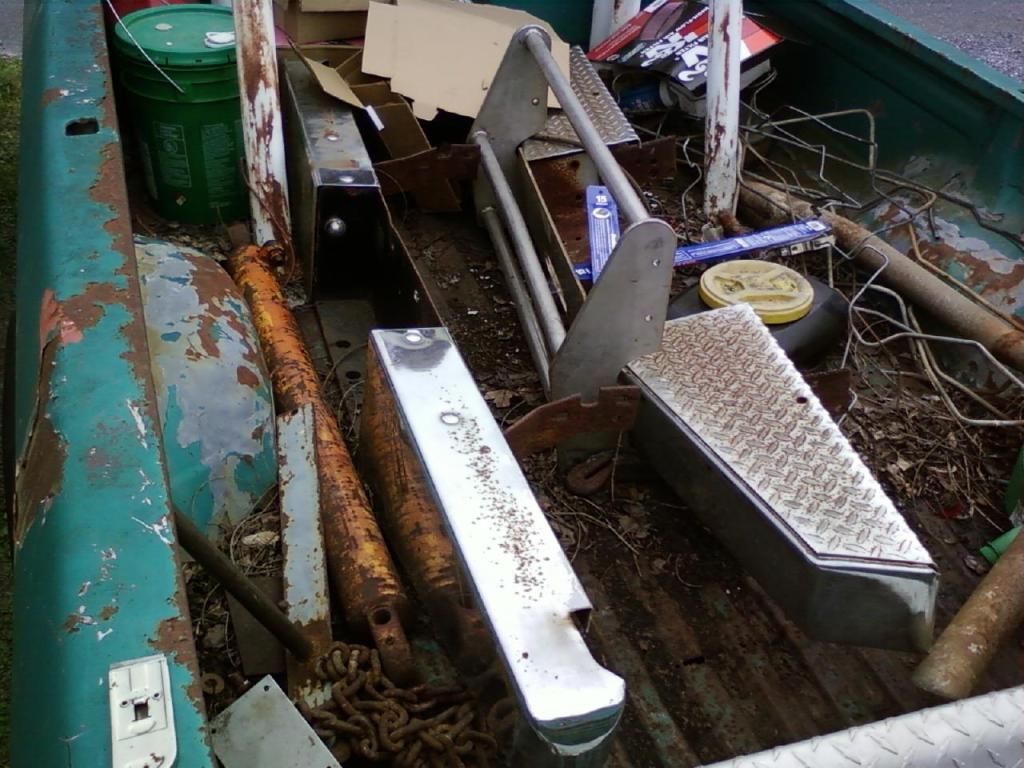
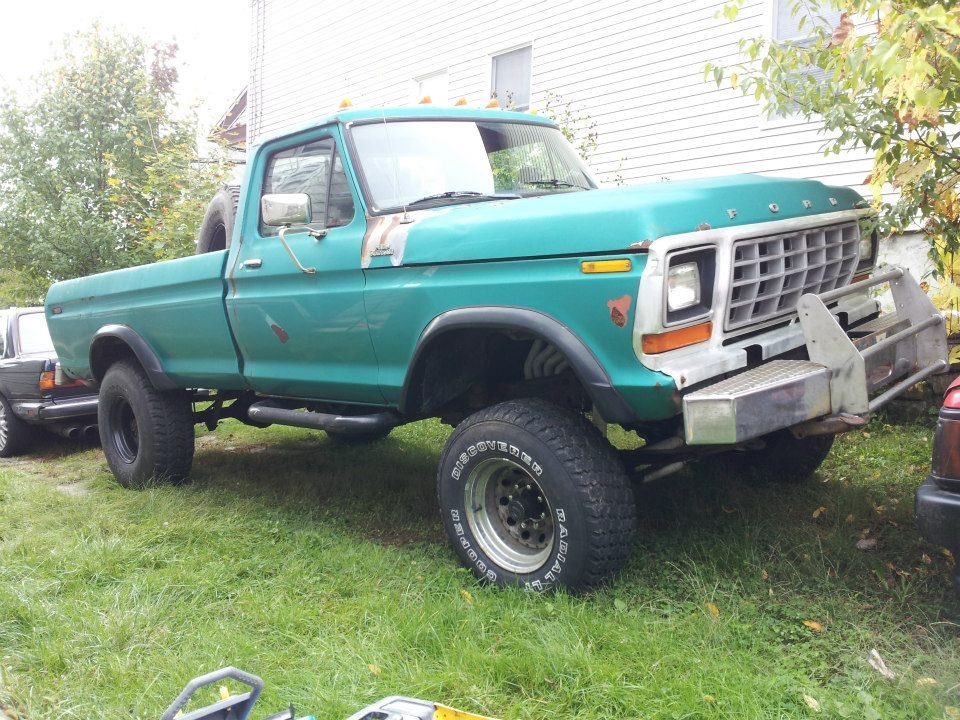
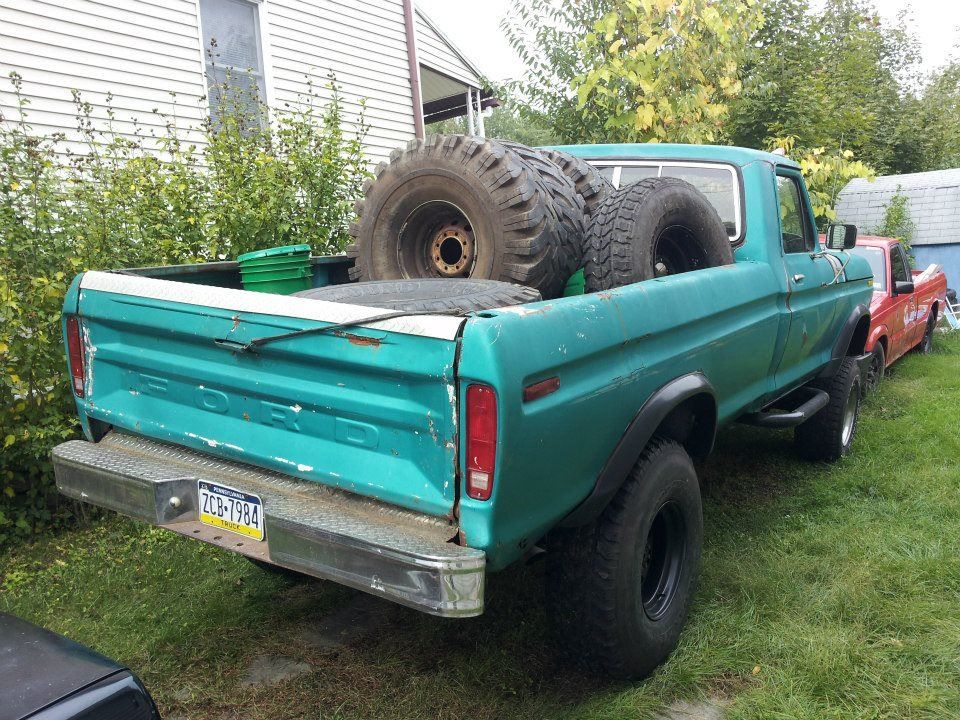
Rear view showing how damaged the bed is from rust and poorly installed body lift:
149312_748889028886_1883669573_n.jpg


As you can tell, the truck needed a lot of work but I felt was a solid base for a project. The first issue wasn't presented by the truck itself, but were I had it delivered to. I was working on an Active Duty National Guard post which does not allow vehicles that are not inspected or registered. I found this odd since regular Active Duty posts have shops that you can work on and store vehicles.

The U-bolts had fallen off and the springs were broken and collapsed:
620713_770590808346_64852187_o.jpg


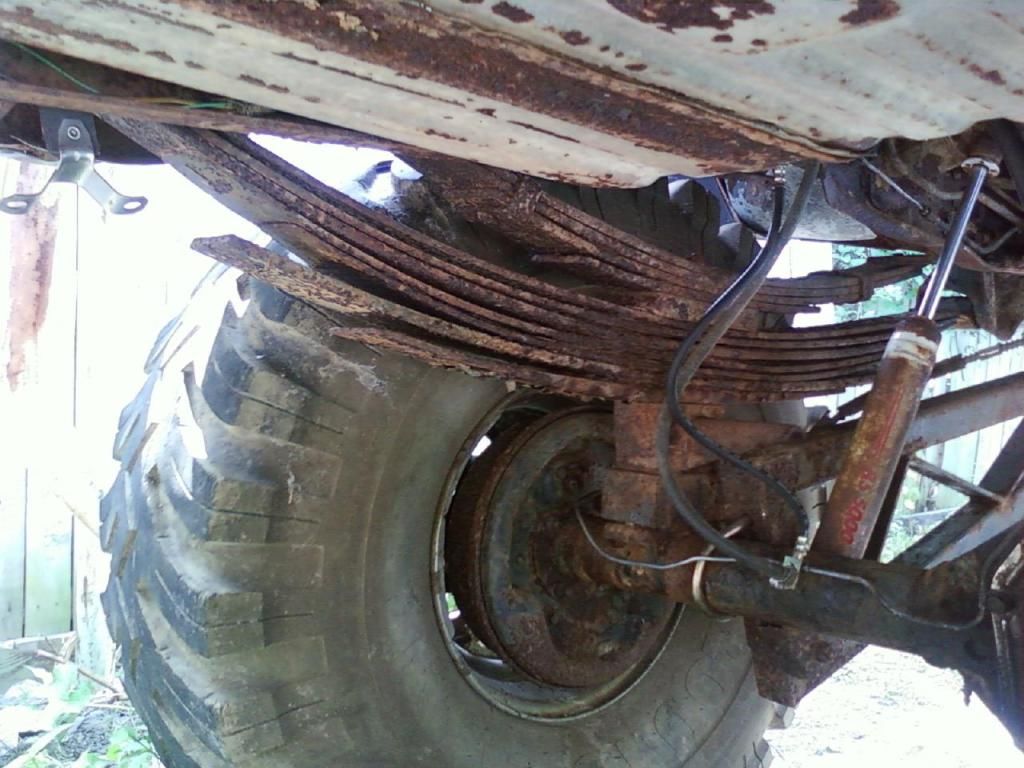
The right side wasn't much better:
337229_770587639696_1088447033_o.jpg


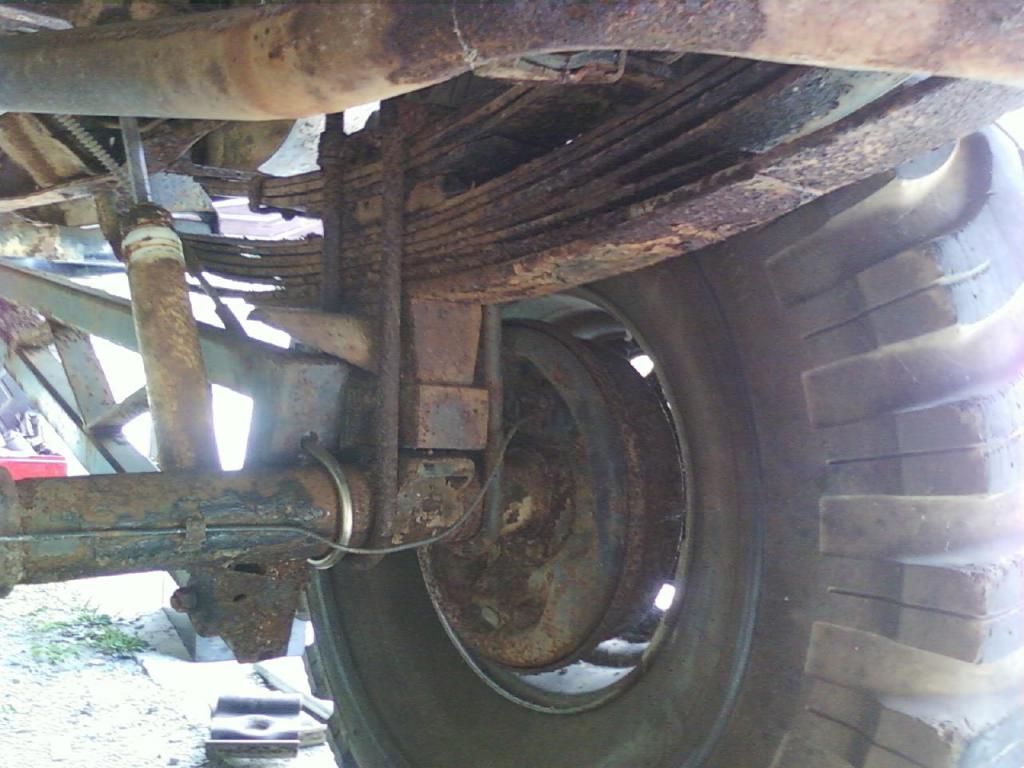
You can see that the weight of the truck compressing the springs are the only thing holding them together:
620713_770590788386_431054417_o.jpg


This wasn't the first thing I addressed though. The 1990's graphics had to go:
458132_752172563656_1760213012_o.jpg


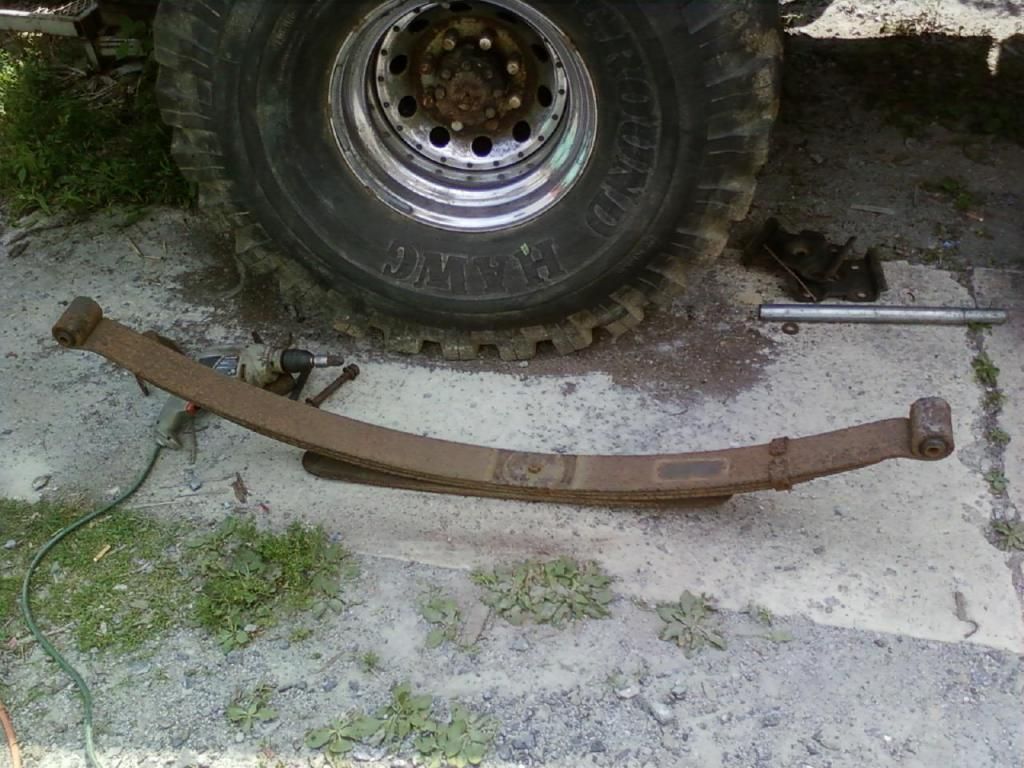
They took most the paint off the doors, but that's okay with me. Once peeled, I could focus on the springs. I picked up a set from an '89 F-250 from a junkyard:
337229_770587664646_561141817_o.jpg


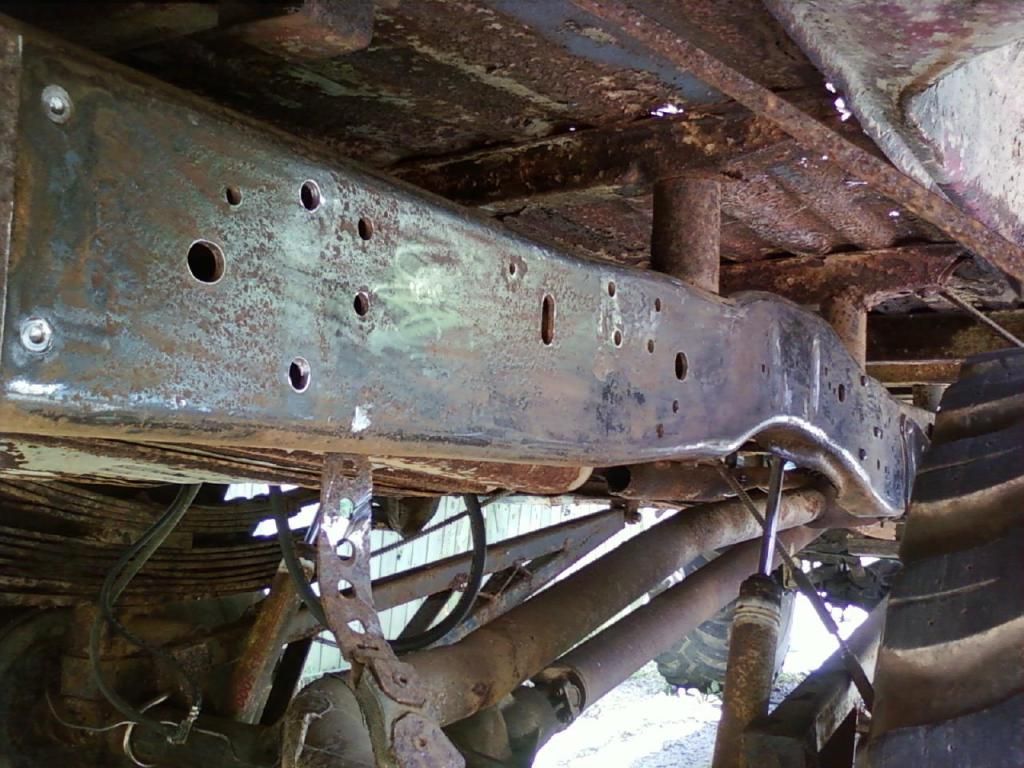
Then I cleaned up the rear of the frame for paint:
620713_770590793376_1699674643_o.jpg


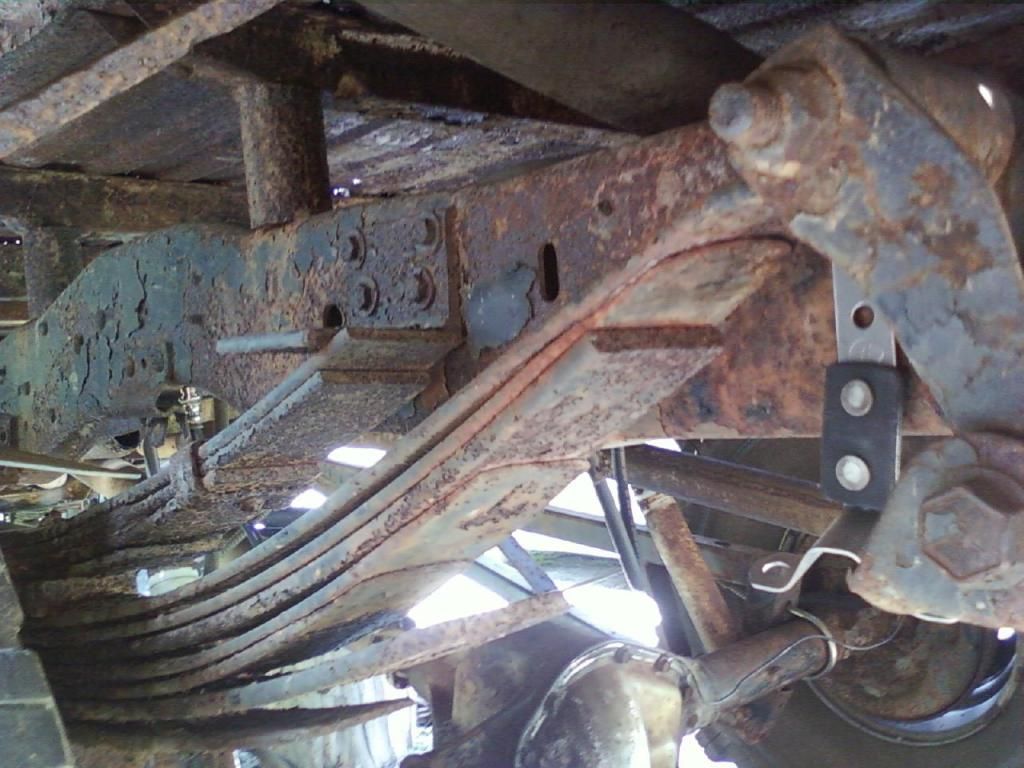
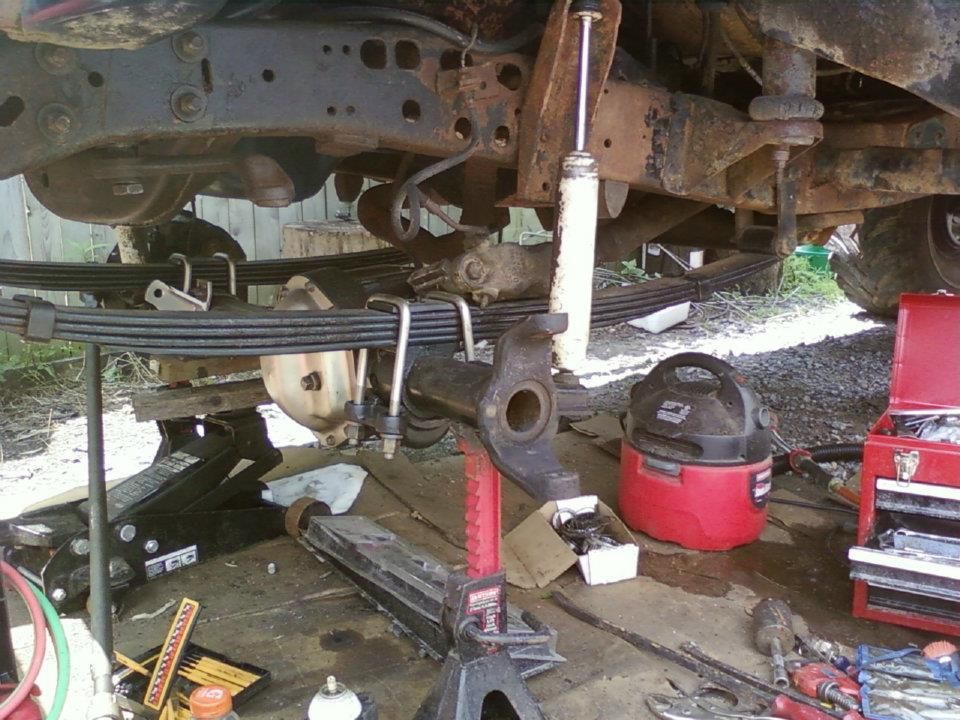
I decided to do the shackle flip that I had read about on this very forum.
I inverted a set of drop hangars intended to lower a leaf spring truck, this allowed for the use of a single 3'' lift block instead of stacking blocks as the previous owner had.
337229_770587654666_1664503410_o.jpg


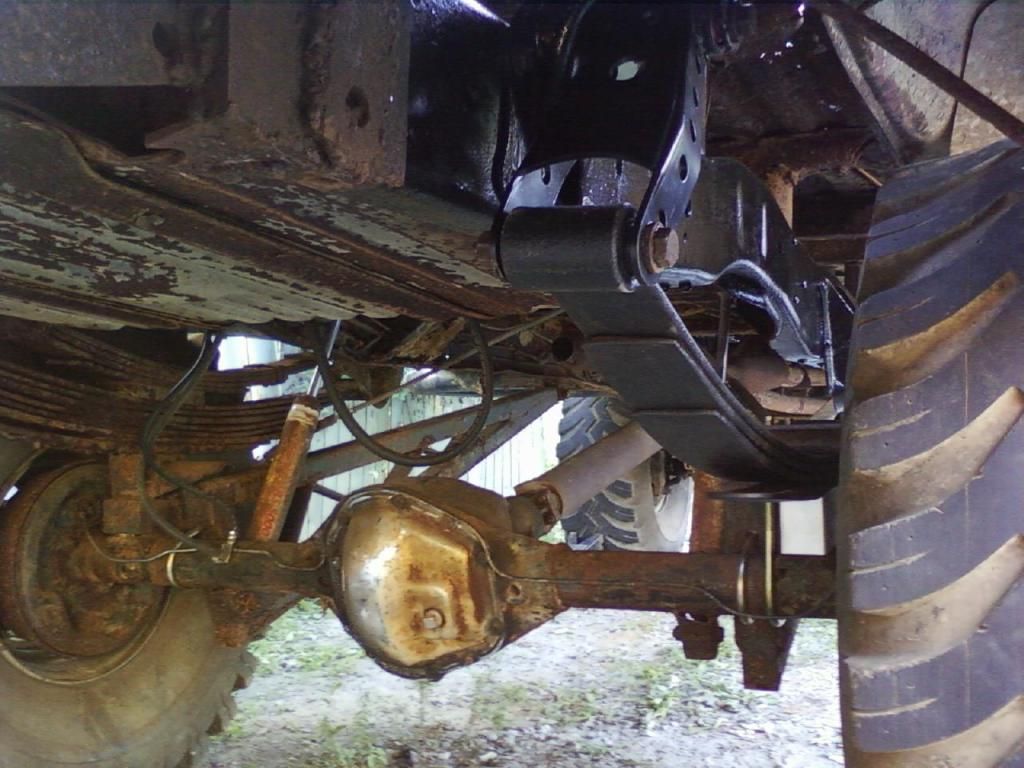
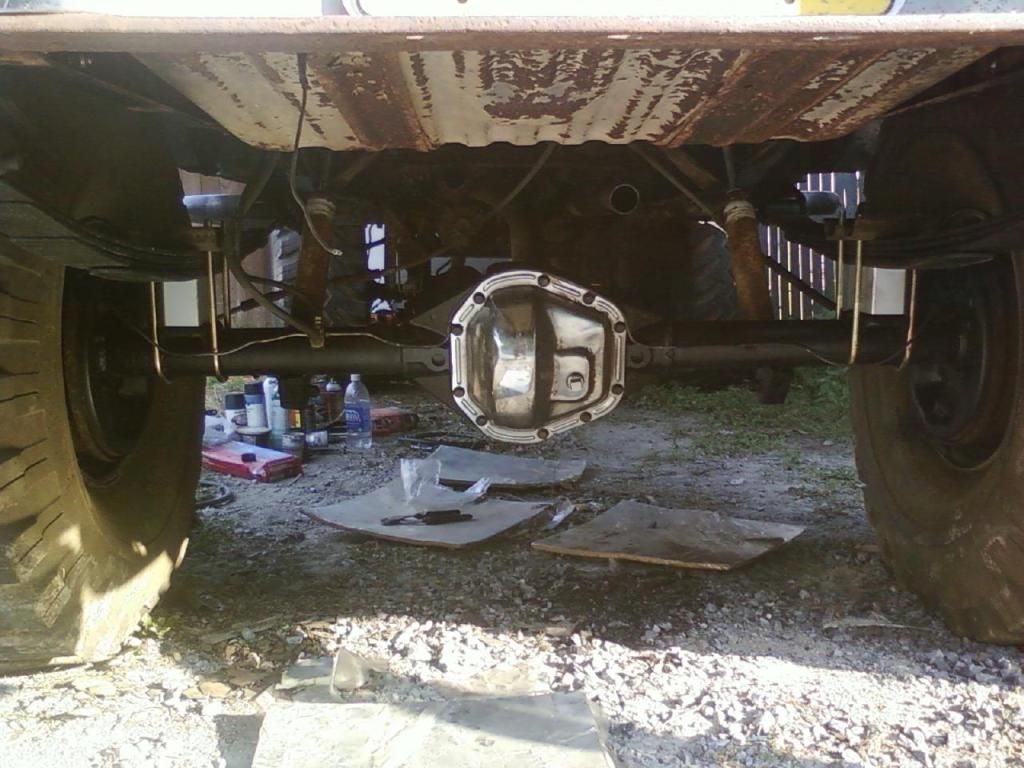
Here is the finished product. I removed the anti-wrap bars because they misaligned the axle to the alignment pins on the springs:
337229_770587649676_521459220_o.jpg


I kept the anti-wrap bars and their brackets if I needed to reinstall them. Now to the front suspension. I decided to replace all of the major components "while I was in there." Although not photographed, I removed 2'' thick anti-wrap bars and the two shortest leaves from the front springs. Here is the front axle after paint, new U-bolts, and the knuckles removed:
255248_774234985386_324691917_n.jpg


I had to remove the left side knuckle because of the use of cheap hardware during the installation of a 4'' spacer for the steering linkage. The bolts broke off in this solid block of steel, so some hammering and torching was required to separate the two. I initially thought I could find another knuckle in the junkyard rather than attempt to drill out the grade 8 bolts from the knuckle. I quickly found out otherwise, and that Ford only used this type of steering set up for 1978-1979. Let the drilling begin. Two days later with the help of friend, his Dad's drill press, and a fortune spent on drill bits I had a usable steering knuckle.
It felt good to have repaired the only steering knuckle in the known universe:
418678_775780138886_591982122_n.jpg


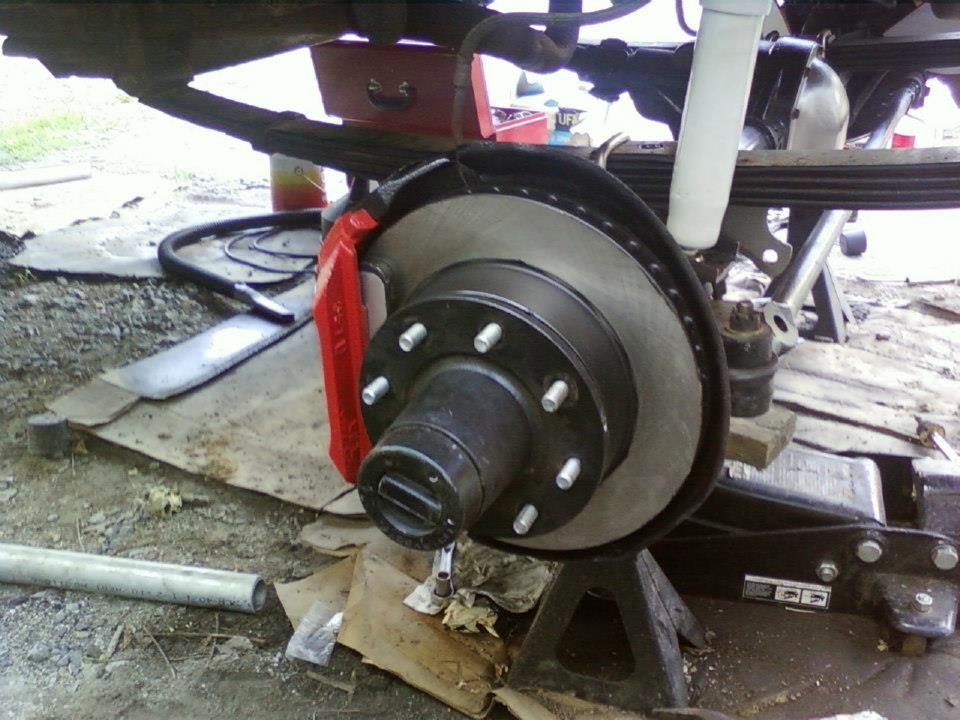
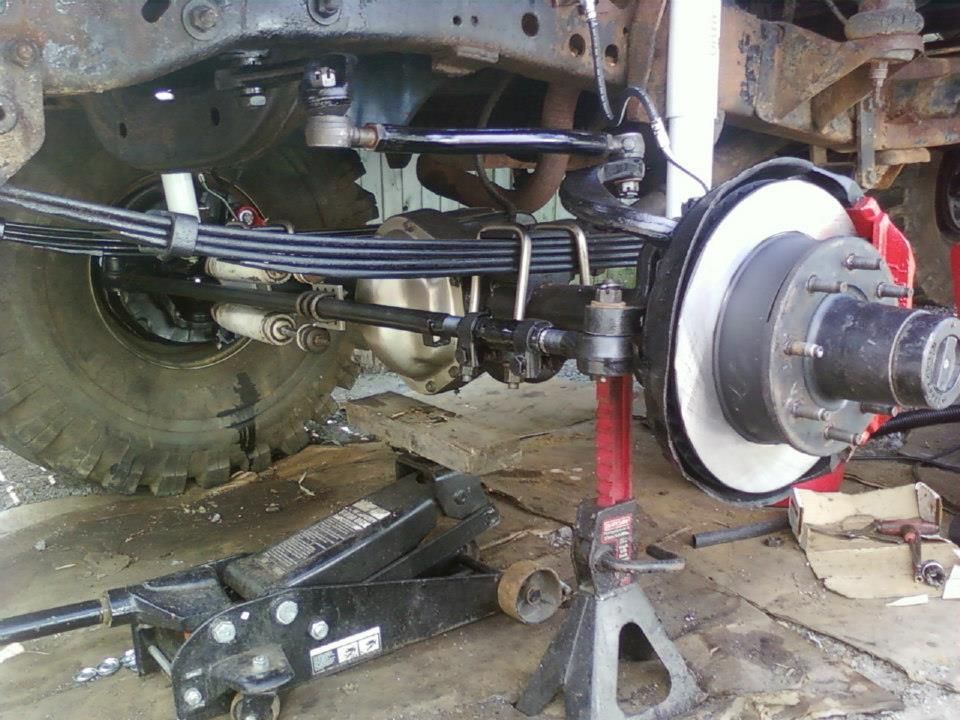
This called for new rotors and calipers:
540436_775780168826_1237900028_n.jpg


229122_776055971116_1955902054_n.jpg


I had to use the aftermarket draglink and and steering link from the knuckle in order to make the steering work properly. A four wheel drive shop in the area helped me cross-reference the tie rod ends that thread into the draglink, which were a TRW part number, were ordered as Duralast parts, and came out of the box with Moog branding:
264959_776056011036_1989491560_n.jpg


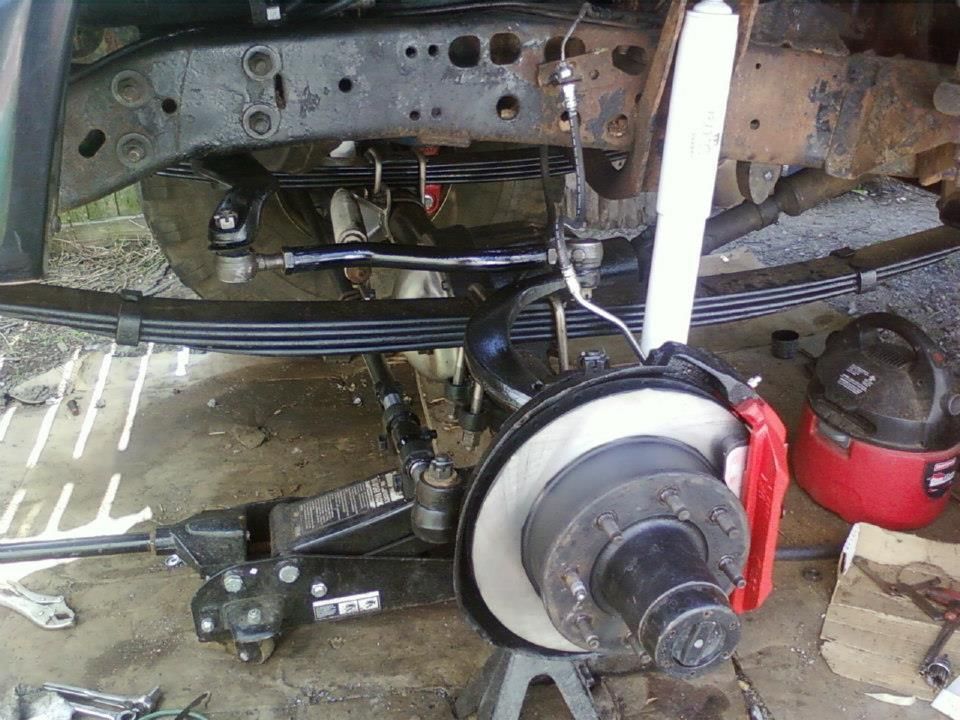
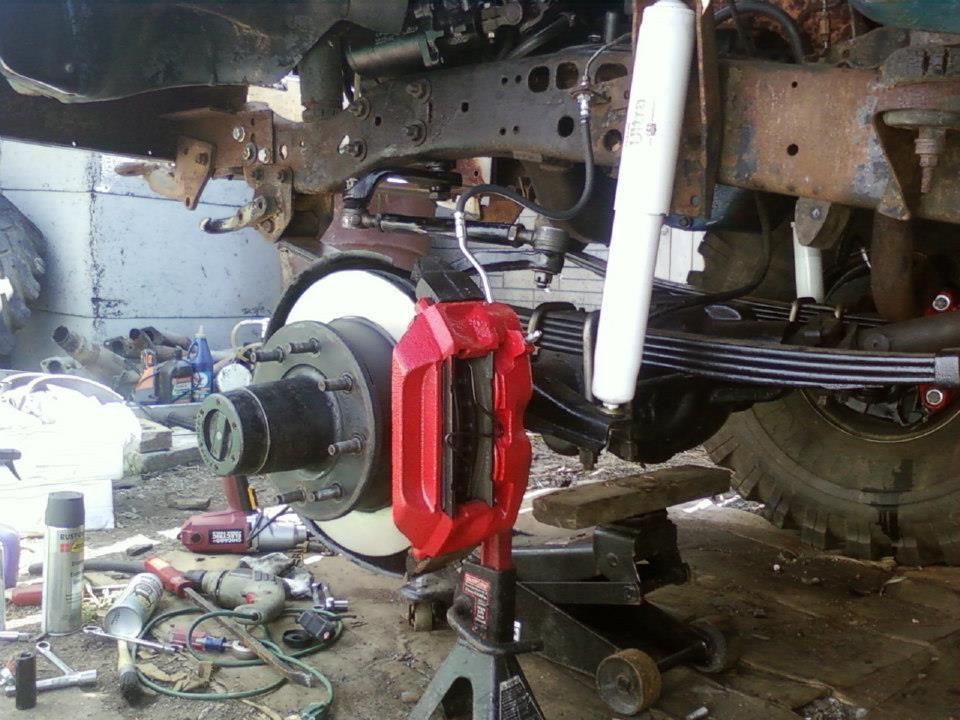
All new steering linkage:
574491_776056055946_889473773_n.jpg


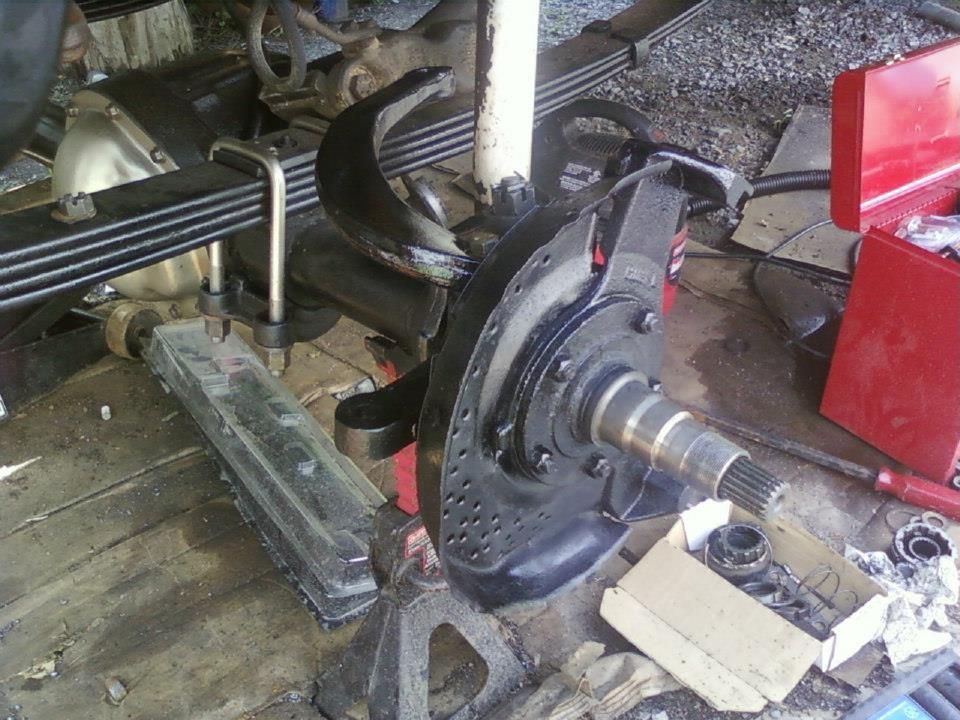
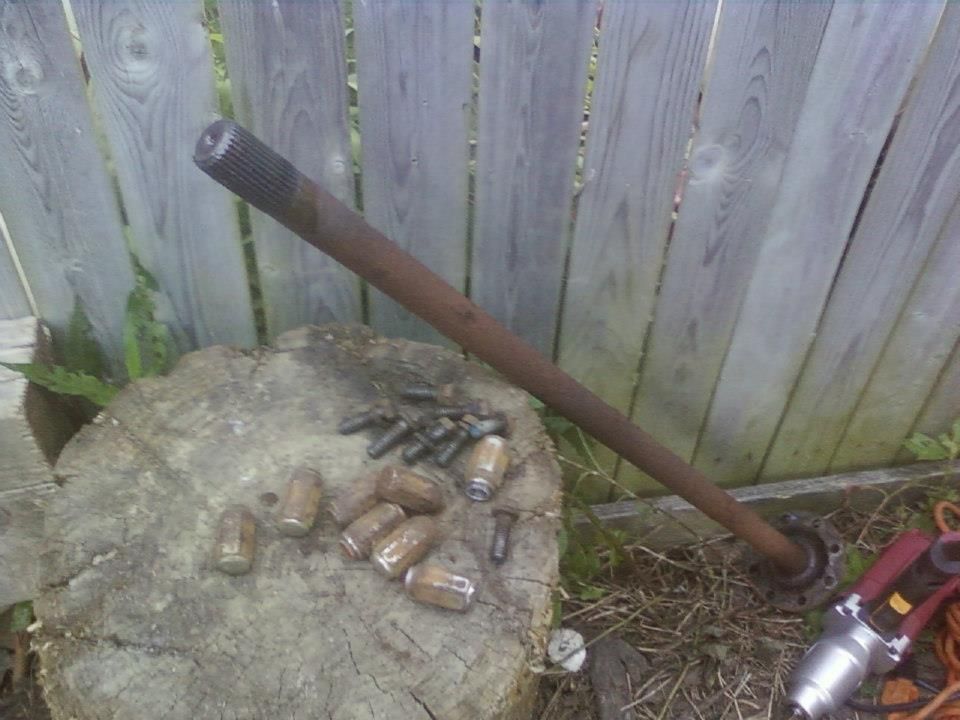
I figured a full rebuild of the rear brakes should be in order. Ford specific Dana rear axles require a specific socket to remove the lock nuts for the bearings. That took a bit of time to source, but I was able to purchase it and remove the axle shafts:
524448_777896837006_817653192_n.jpg


Then to see what lurked inside the hubs:
307882_784178757986_1177548868_n.jpg


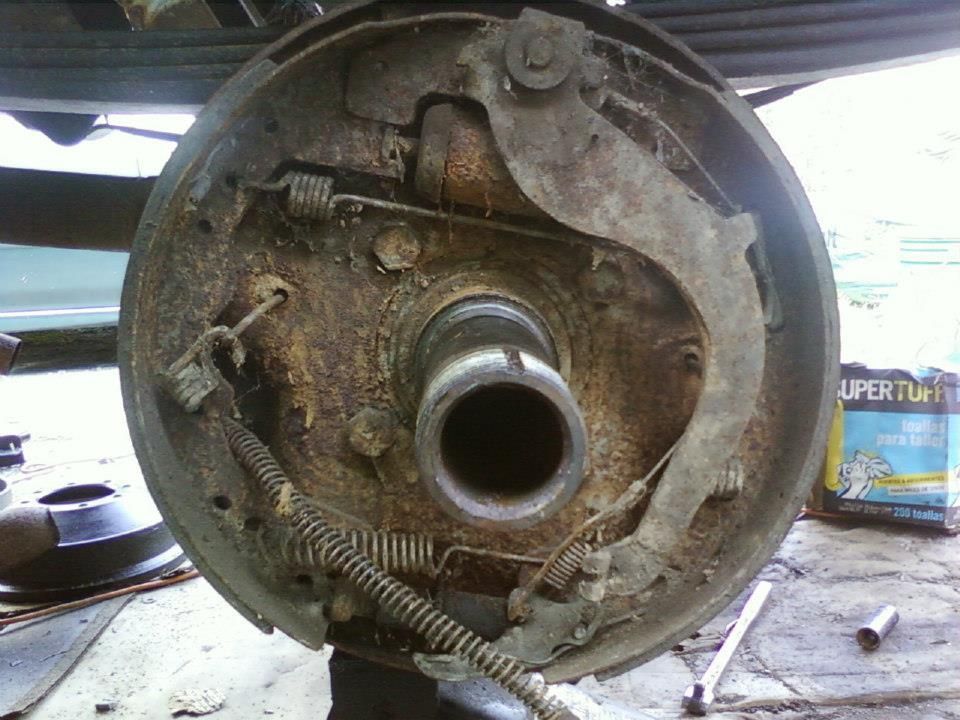
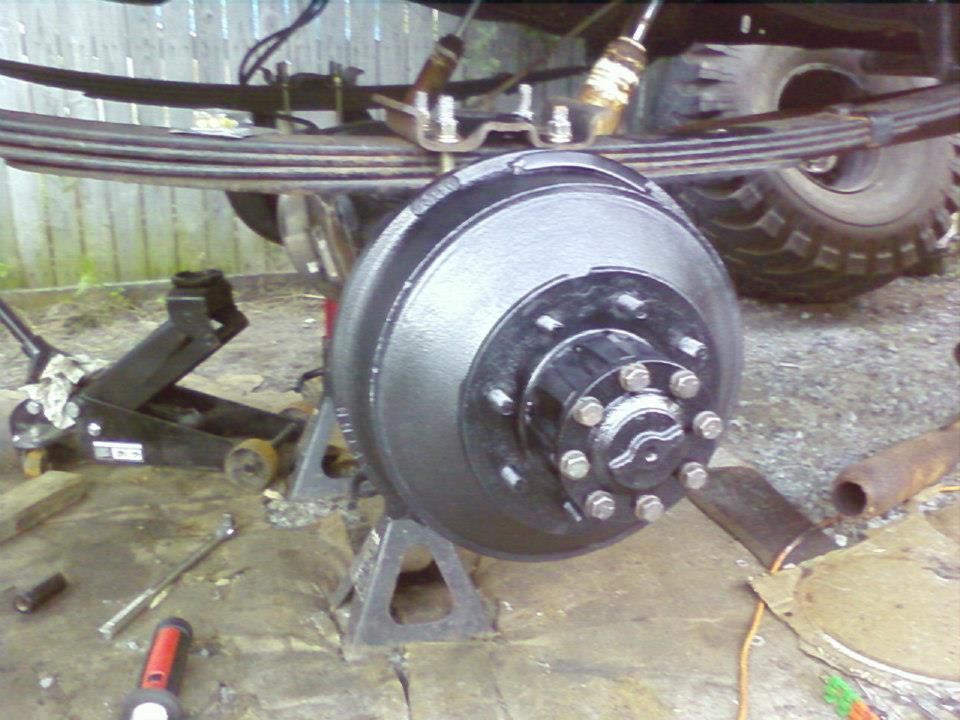
They received the same treatment as the front brakes:
393481_784178767966_39032474_n.jpg
 
Last edited by a moderator:
Part Two of the first post

With all of this done, I could focus on the engine. My first order of business was the wiring. For whatever reason, the previous owner had untaped the engine harness:
534462_759587863336_1638116711_n.jpg


This took some time to fix:
168523_759587943176_585919703_n.jpg


I had also read from this forum about swapping the power steering pump out for a Saginaw pump from an 80's era Econoline van. I had to fabricate a bracket to make it work. After doing this, I decided to clean up the motor since it was leaking a lot of oil. The tear down:
217909_777897016646_1274557147_n.jpg

I found a set of hardened steel Edelbrock push rods under the Edelbrock Performer 400 intake:
300708_777897041596_791753939_n.jpg


I had picked up a set of headers while at the junkyard, and thought this would be the time to install them after a bit of cleaning and paint:
556552_777896921836_1001861192_n.jpg


546551_777896956766_958581673_n.jpg


New and improved exhaust:
574715_777897081516_1712551225_n.jpg


The nice thing about a body lift is that it can be used to show off your work:
547109_777897121436_1513965764_n.jpg


The freshly repainted motor:
559175_777897151376_369009159_n.jpg


I have access to a sandblaster at work, so I stripped the valve covers and intake. I painted the valve covers with VHT's crinkle black and the intake flat aluminum:
318413_784178787926_1039528831_n.jpg


This called for a new carburetor, an Edelbrock 650 none the less:
564290_784178618266_946754395_n.jpg


I decided to paint the air filter housing to match the valve covers:
386194_784178643216_1494821732_n.jpg


223118_784178683136_532868780_n.jpg


I finished putting everything back on the motor and had to deal with a fuel supply issue. This was solved by installing an adjustable fuel pressure regulator along with new fuel lines and a new 97 GPH Holley electric fuel pump. While dealing with this, I felt the need to remove the homemade front bumper and ill-fitting roll bar. The truck came with spare bumpers, so I will use the front one. It is a Warn, so why not:
466876_752449309056_1666893834_o.jpg


A friend brought an oxy-cydelene torch to the party which made short work of removing the front bumper. Here is the Warn going on:
600316_759588023016_335618688_n.jpg


And the roll bar went on craigslist:
599295_759588067926_1255864179_n.jpg


Here it is next to normal sized car:
620713_770590803356_300618175_o.jpg


I even built radio controlled version of it, in my spare time:
616699_770857284326_2104186693_o.jpg


Current ride height after taking 4'' of lift out to attempt to pass PA inspection:
378211_773627752286_1023425203_n.jpg


It wasn't enough though. Time for Plan B, which will be a smaller set of tires. To be honest, the Ground Hawgs were in rough condition since they were dry-rotted and the truck was a bit sketchy to drive with them. I acquired a set of 37's and wagon wheels. 32 new lug nuts and some paint, the
result is this:
12678_792428764906_807775563_n.jpg


The new tires make the body lift look out of place. I had ordered a complete bushing and hardware set, so that will corrected soon.
All of this was done after hours and on weekends in 4 months. I originally thought I had more time, but I received orders for a deployment to Kuwait. That changed things. This will be my second tour, I was in Iraq in 2008. No concern there, just inconvenient.
Since I live almost 90 miles away from where the truck is, it was time for a road trip. One of the new tires decided it wasn't going to be friends with an old rim, so it let out its air and they separated. I had to put on the spare, which is a 33'':
397205_792494732706_786950859_n.jpg


I made the road trip with mismatched tires with only one break down from a clogged fuel filter. It didn't pull to the right as hard as I thought it would. It did follow groves in the road and it would pull to the right upon braking. I loaded up the 44's and all of my tools in the back:
425946_792494782606_214517846_n.jpg


I plan on having the body work done while overseas. I was looking into four linking the rear and three linking the front with a pan hard bar up front. I might have that done, or start on it when I get back. Sort depends on how much the body work costs.
 

Fellro

Moderator
Staff member
Very nice! Do you plan on having it shipped over or something?
 

LEB Ben

Arrogant A-hole At-Large
34,919
1,124
outside your house
Helluva first post...welcome aboard. A lot of good work there.
 

Workin' Rig

Stone Cold Bo Norris
Thats gonna be a nice rig when your done...cant wait to see it
 
Very nice! Do you plan on having it shipped over or something?
Thanks! I meant that I would have the body work done by a local shop while I am in Kuwait. It would be nice to have it overseas, but shipping it there and back would at least $3,000.

Helluva first post...welcome aboard. A lot of good work there.
Thanks. To be honest, I should have introduced myself on the introductory board back in May when I joined this forum. I have been reading threads and getting ideas since then to help get this truck to where it is.

First and foremost, thank you for your service to our country! I agree with Ben, a great first post and incredible work on your truck! Welcome to FTF!!!
Your welcome, I am honored to serve! I like the challenge of projects like this.

Way to bring it back from the dead !! Welcome to FTF.
No kidding! The previous owner had the truck sitting in front of his house for 10 years. Its rewarding to bring something like this back from the brink.

Looks like a lot of work. Love the tailgate latch. :D
Yes it was. The ''latch" is what is holding the bed together. The floor is rusted out, so there isn't much structural rigidity left.

Thats gonna be a nice rig when your done...cant wait to see it
Thanks! I believe once the body and interior are done it will be a really nice truck. I'm not going for show truck quality, but a nice paint job and proper body work will make a difference.
 
Incredible work!!! great pictures to go with a great write up for each stage of the build. Welcome to FTF!!
(can't wait to see the new interior)

smilieFordlogo

Thanks, amkatt1! I like to photograph progress so that I can look back on the build. I plan on having the interior done after the body work. Interiors are extremely important to me, since that is where you spend the majority of your time while driving. While I was building my other car, every other order of parts were for the interior even though it didn't run.
I have replaced the column and put the right diameter steering in, along with an instrument bezel. The P/O had cut out the radio and heater bracket to install a late model radio and must have thrown away the original bezel since it would no longer fit. That being missing bothered me more than the broken rear springs. Rationalized insanity, I suppose.
I'll post some pics of the finished motor and interior once I clean the tools and parts out of it.
 

fatherdoug

Tonto Papadapolous
Thanks, amkatt1! I like to photograph progress so that I can look back on the build. I plan on having the interior done after the body work. Interiors are extremely important to me, since that is where you spend the majority of your time while driving. While I was building my other car, every other order of parts were for the interior even though it didn't run.
I have replaced the column and put the right diameter steering in, along with an instrument bezel. The P/O had cut out the radio and heater bracket to install a late model radio and must have thrown away the original bezel since it would no longer fit. That being missing bothered me more than the broken rear springs. Rationalized insanity, I suppose.
I'll post some pics of the finished motor and interior once I clean the tools and parts out of it.

Those radio/heater brackets come up regularly on E-bay. I bought mine for $5. It looked horrible, but it was all surface rust. It buffed out to look like new.
 

DNFXDLI

The Token Canadian
Staff member
Great post!...looking forward to seeing more! smilieFordlogo YelloThumbUp
 

Fellro

Moderator
Staff member
Now I am going to have to go get a look at the radio brackets and bezels I have...
 

460Trucker

Has the Cat Scratch Fever
Like Brad said, thank you for your service to our country!
Outstanding work on that truck, I look forward to reading about your progress smilieFordlogo
 
Those radio/heater brackets come up regularly on E-bay. I bought mine for $5. It looked horrible, but it was all surface rust. It buffed out to look like new.
There happened to be a parts truck at the 4WD shop that helped with the steering, so I cannibalized it. I was able to get the hood hinges and latch, miscellaneous items under the hood, interior parts. I could have got the axles, which are 1979 Dana 44/60's, but I am out of time.
There is an excellent you-pull-it yard about 2 hours from my house that has a good stock of 6th gen F-series trucks. You do have to buy whatever you see while you are there, otherwise it will be smashed by the front end loader before you can come back for it.
great work! look forward to more pics..
I plan on updating some more pics tomorrow, rambler. I had to unload the truck today after making an 80 mile road trip with all of my tools and parts.

Great work on bringing that truck back. Also, thanks for serving our country and all you do.[/QUOTE
You're welcome, buck! I was able to see the potential of the truck when I first looked at it.

Great post!...looking forward to seeing more! smilieFordlogo YelloThumbUp
Thanks, DNFXDLI! I plan on updating progress on this truck even if I have to do it remotely.
Now I am going to have to go get a look at the radio brackets and bezels I have...
I'm sure someone who needs one will appreciate that, Fellro.

Like Brad said, thank you for your service to our country!
Outstanding work on that truck, I look forward to reading about your progress smilieFordlogo
You're welcome, 460Trucker! This thread can not capture how much actually went into this truck.

+1

and

Welcome to FTF!
seeyamustang.gif
Thanks, polarbear!
 

Ford Truck Articles

Recent Forum Posts

Top