O'Rattlecan
Redneck Prognosticator
Here is a how-to guide for those wanting to replace the clockspring in their generation 9 F-series or E-series pickups. The part numbers are different among the different models, but installation procedures are similar.
This problem gave my truck a series of symptoms. Among them were hard transmission shifts, intermittant (and ultimately failure) of speed control, and a non-functional horn.
The removal and installation of the clockspring is relatively simple provided the correct tools are available. And now we begin...
Tools needed:
Basic set of metric and standard sockets and a socket ratcheting wrench
Steering wheel puller kit (can be rented at most auto parts store - sometimes for free)
Basic #2 Phillips screwdriver
Torx head screwdriver
Step 0: UNPLUG YOUR BATTERY AND DISCHARGE THE POSITIVE LOOP BY TOUCHING THE POSITIVE CABLE TO THE NEGATIVE BATTERY POST.
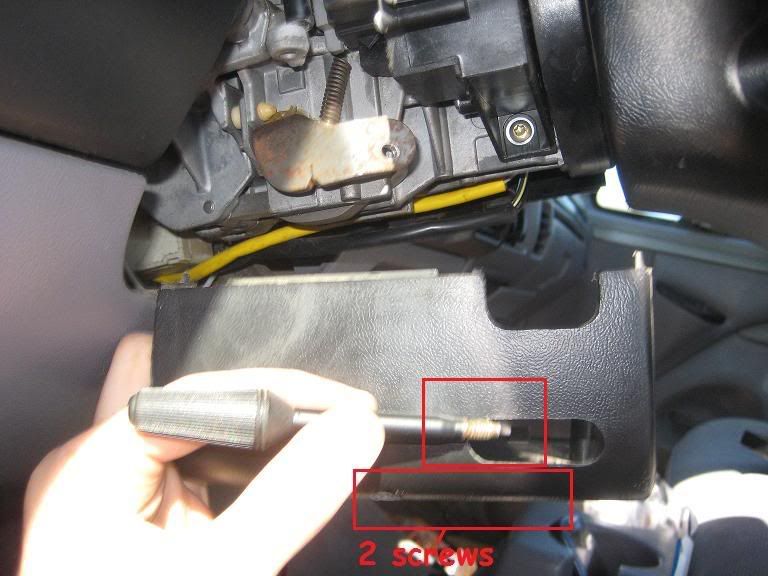
The first step is to remove the lower steering column cover. Do so by first removing the tilt steering lever by simply turning it left until it unthreads. The next step is to remove the 2 (or is it 3?) screws on the underside of the steering column. This piece should very easily be removed if you have removed all these screws.
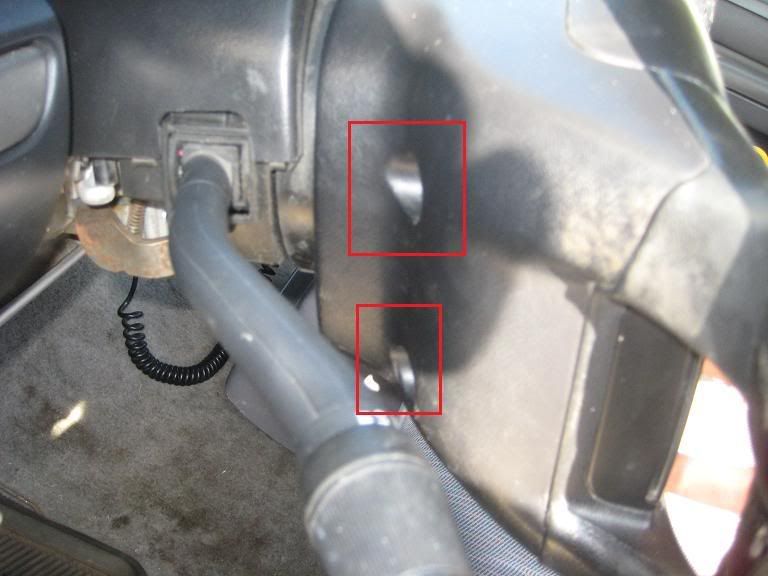
The next step after the removal of the lower steering column cover is to remove the airbag. We unplugged the battery for this step. The airbag may deploy if the battery is unplugged. AGAIN MAKE SURE THERE IS NO POWER TO YOUR TRUCK. There are 4 bolts that hold the airbag to the front of the steering wheel. Two bolts are on either side of the back of the wheel. Use a regular hex wrench to remove these.
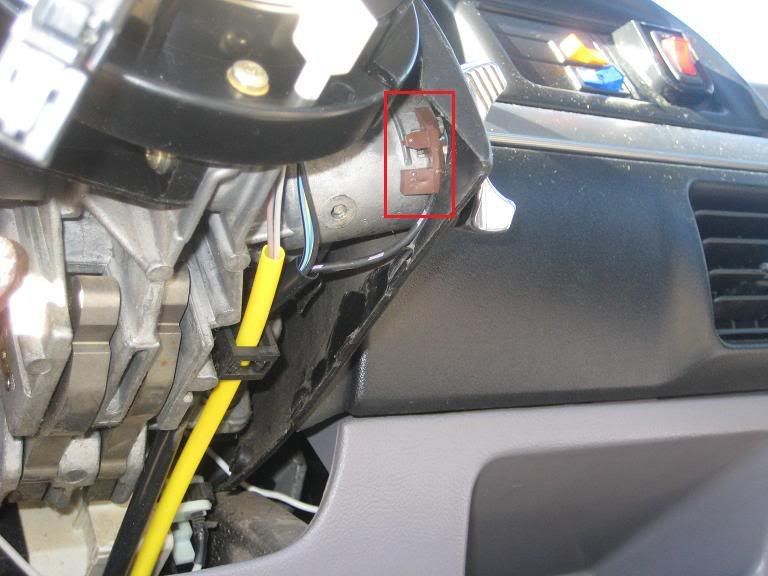
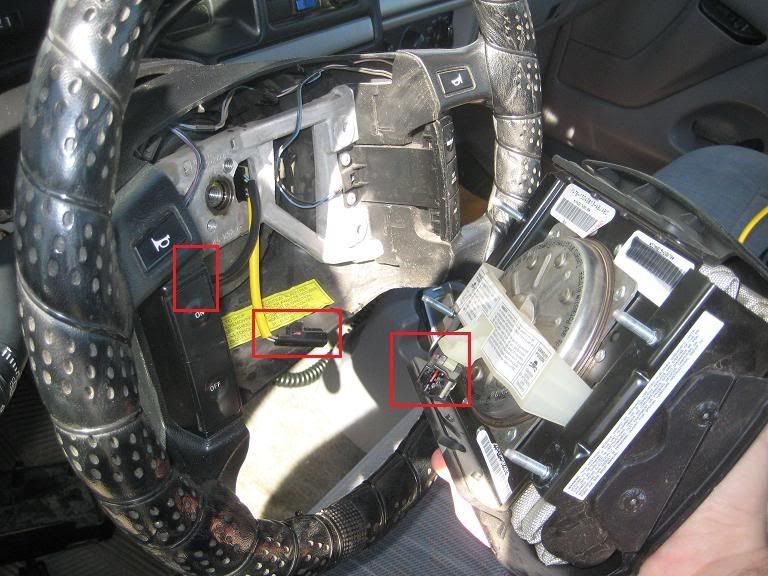
Here is your last chance to unplug your battery. Disconnect the airbag wire harness along with the speed sensor wire harness that connects to your cruise control buttons to the left.
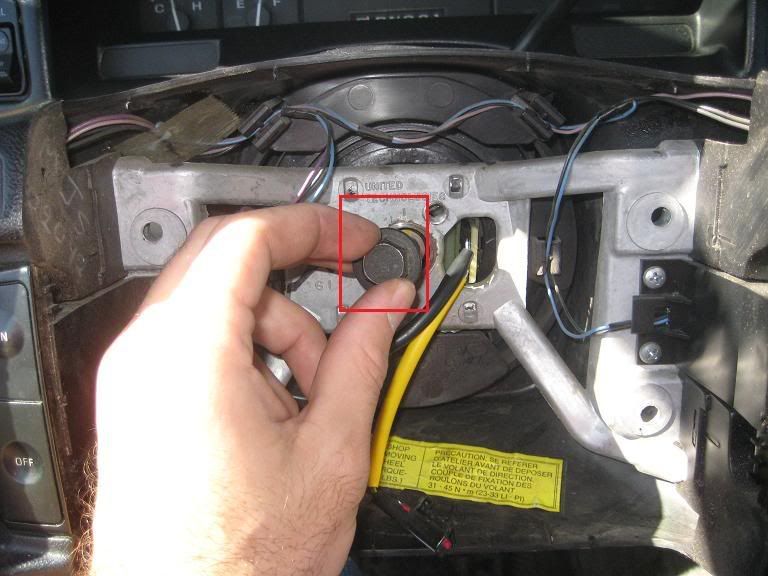
Next use a socket and a socket wrench to remove the center bolt of the steering wheel. After removing it, replace it with about 2-3 turns of the bolt. This needs to be loose to complete the next step.
Here is the steering wheel puller set I was able to rent from O'Reilly's for free.
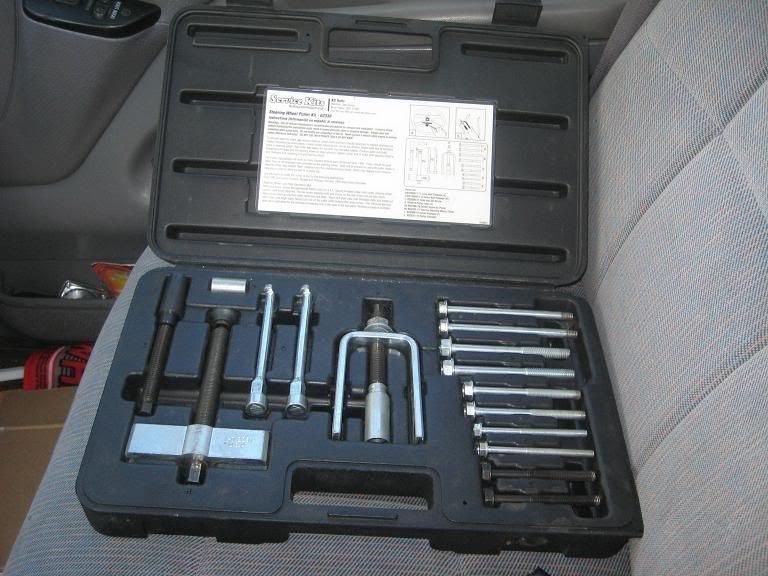
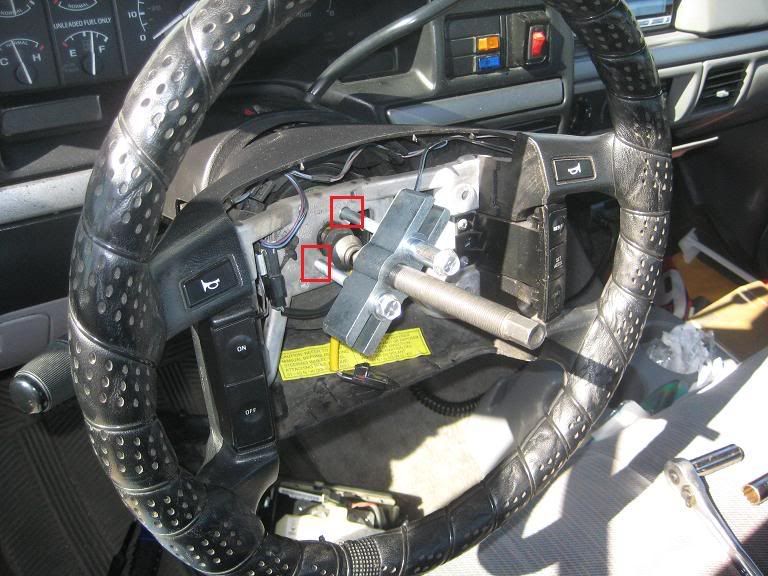
The next step is to install the steering wheel removing kit. Only certain threaded bolts should fit, so don't force anything. Configure the setup like so. The reason for me using different bolts should not apply to most of you. My wheel looks like it was damaged before and a sleeve was inserted to replace the original threads.
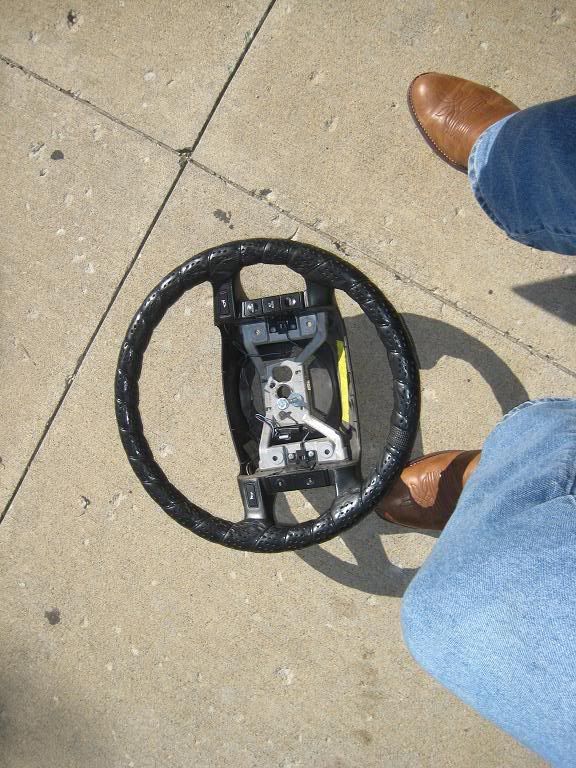
When you torque the end of the steering wheel remover, it should pop loose. It slid off easily after that.
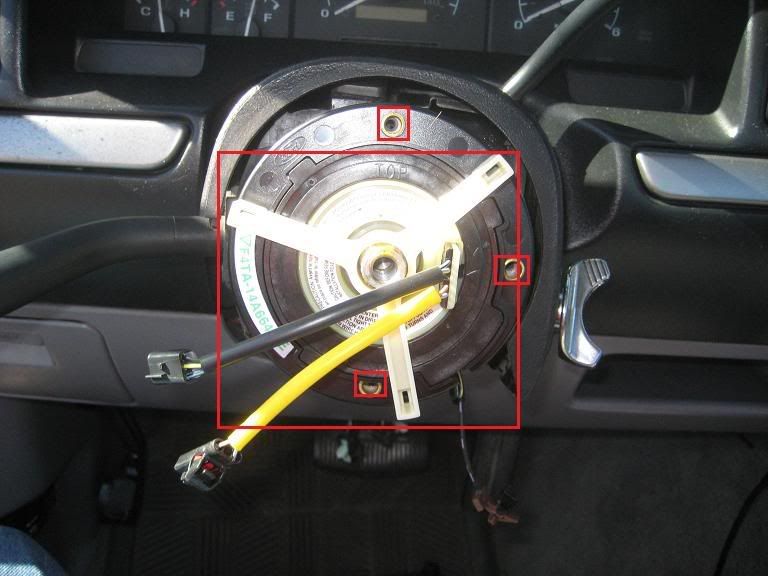
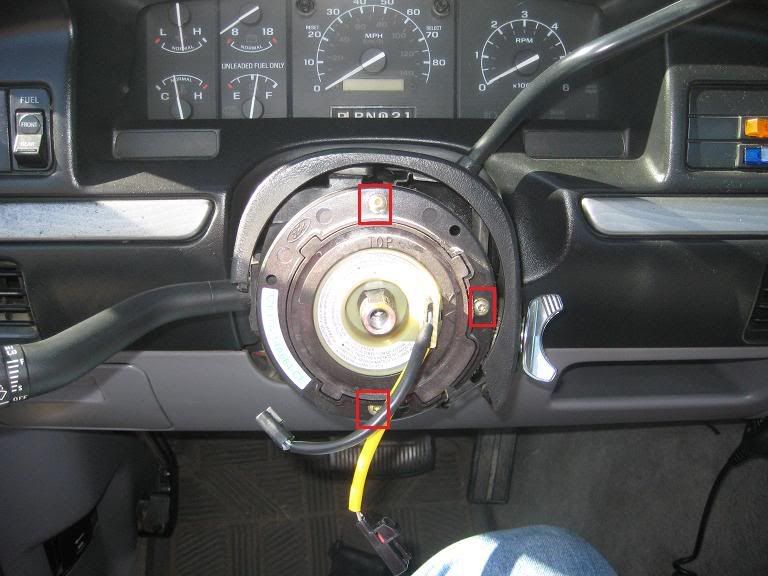
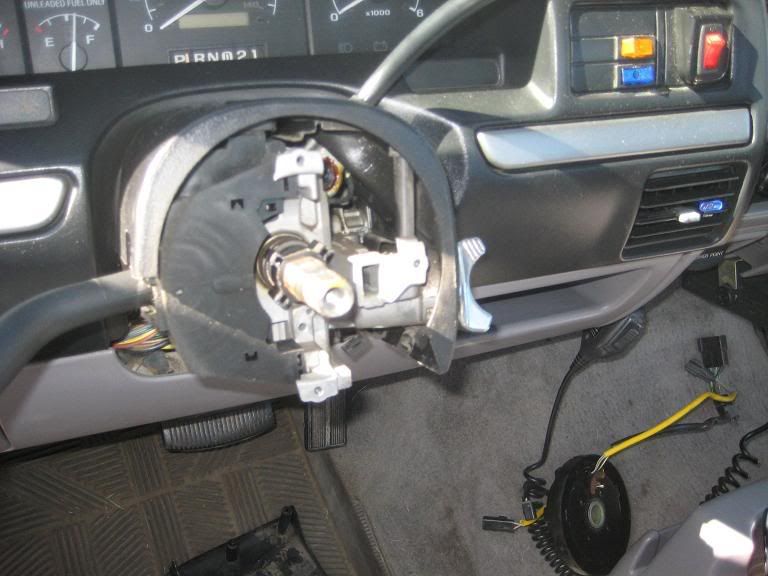
This is your column without the wheel. The item you're looking at is the clockspring. The clockspring is mounted with 3 torx style screws. I'm not sure what size torx head this is, but most sets include 2 sizes, and this was the larger of my two craftsman screwdrivers.
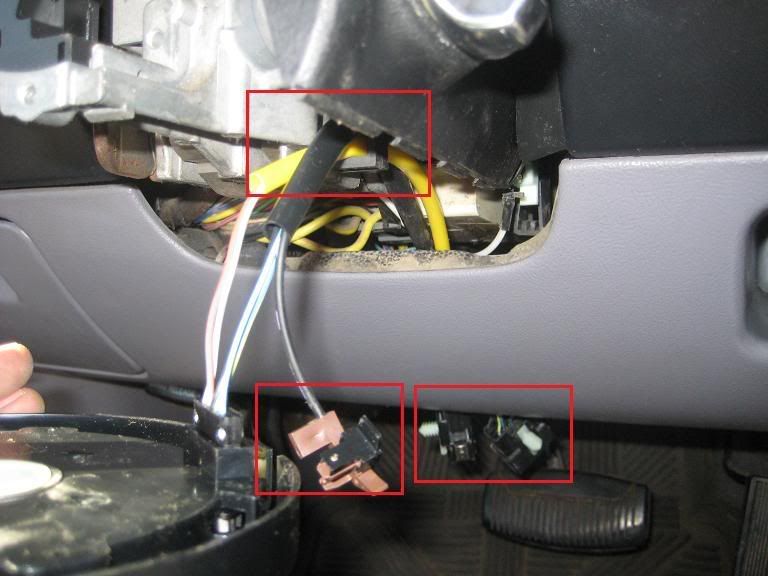
Underneath the dashboard, you need to follow the two wires down to the wire harnesses for removal. A picture shows the two permanent wires where you need to unplug the old clockspring from.
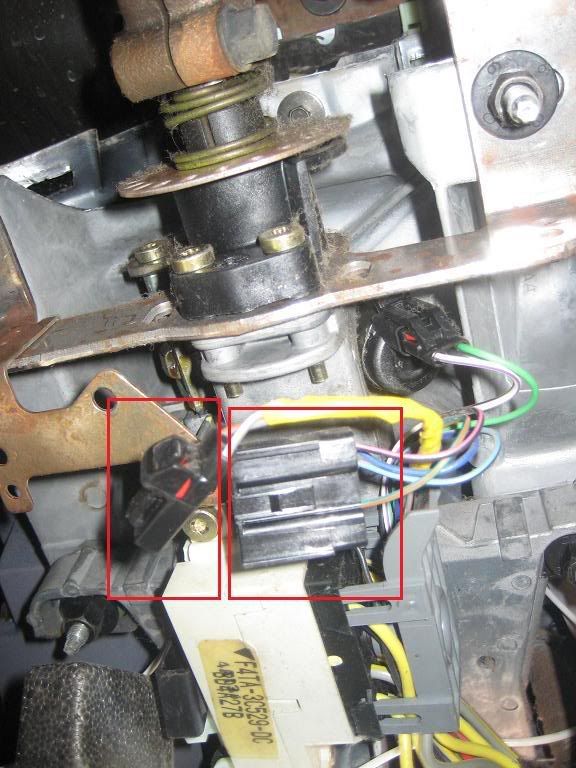
Unharness the wires from their routing harnesses. The clockspring is now ready to be removed.
More in the next post...
Ryan
This problem gave my truck a series of symptoms. Among them were hard transmission shifts, intermittant (and ultimately failure) of speed control, and a non-functional horn.
The removal and installation of the clockspring is relatively simple provided the correct tools are available. And now we begin...
Tools needed:
Basic set of metric and standard sockets and a socket ratcheting wrench
Steering wheel puller kit (can be rented at most auto parts store - sometimes for free)
Basic #2 Phillips screwdriver
Torx head screwdriver
Step 0: UNPLUG YOUR BATTERY AND DISCHARGE THE POSITIVE LOOP BY TOUCHING THE POSITIVE CABLE TO THE NEGATIVE BATTERY POST.
The first step is to remove the lower steering column cover. Do so by first removing the tilt steering lever by simply turning it left until it unthreads. The next step is to remove the 2 (or is it 3?) screws on the underside of the steering column. This piece should very easily be removed if you have removed all these screws.
The next step after the removal of the lower steering column cover is to remove the airbag. We unplugged the battery for this step. The airbag may deploy if the battery is unplugged. AGAIN MAKE SURE THERE IS NO POWER TO YOUR TRUCK. There are 4 bolts that hold the airbag to the front of the steering wheel. Two bolts are on either side of the back of the wheel. Use a regular hex wrench to remove these.
Here is your last chance to unplug your battery. Disconnect the airbag wire harness along with the speed sensor wire harness that connects to your cruise control buttons to the left.
Next use a socket and a socket wrench to remove the center bolt of the steering wheel. After removing it, replace it with about 2-3 turns of the bolt. This needs to be loose to complete the next step.
Here is the steering wheel puller set I was able to rent from O'Reilly's for free.
The next step is to install the steering wheel removing kit. Only certain threaded bolts should fit, so don't force anything. Configure the setup like so. The reason for me using different bolts should not apply to most of you. My wheel looks like it was damaged before and a sleeve was inserted to replace the original threads.
When you torque the end of the steering wheel remover, it should pop loose. It slid off easily after that.
This is your column without the wheel. The item you're looking at is the clockspring. The clockspring is mounted with 3 torx style screws. I'm not sure what size torx head this is, but most sets include 2 sizes, and this was the larger of my two craftsman screwdrivers.
Underneath the dashboard, you need to follow the two wires down to the wire harnesses for removal. A picture shows the two permanent wires where you need to unplug the old clockspring from.
Unharness the wires from their routing harnesses. The clockspring is now ready to be removed.
More in the next post...
Ryan