O'Rattlecan
Redneck Prognosticator
Well guys, I recieved my Perma-Cool 19510 electric fan in the mail about two and a half weeks ago and got this puppy installed about a week and a half ago.
Anyway, the item is basically a dual 13" electric fan setup with an onboard thermostat controller. The fan has a 'probe' to detect temperature by inserting it into the radiator core.
Step 1: Figure out what needs to happen.
The shroud and fan are in place and take up almost all of the room in the front of the engine bay. In removal, you'll have to figure out how to remove the fan from the pulley and remove the shroud from the engine bay.
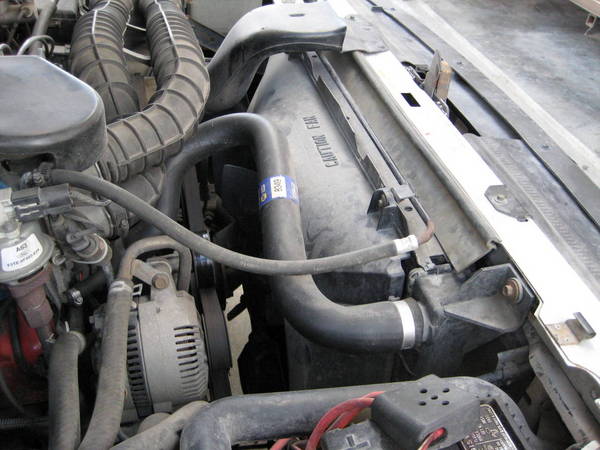
That's what it looks like before...
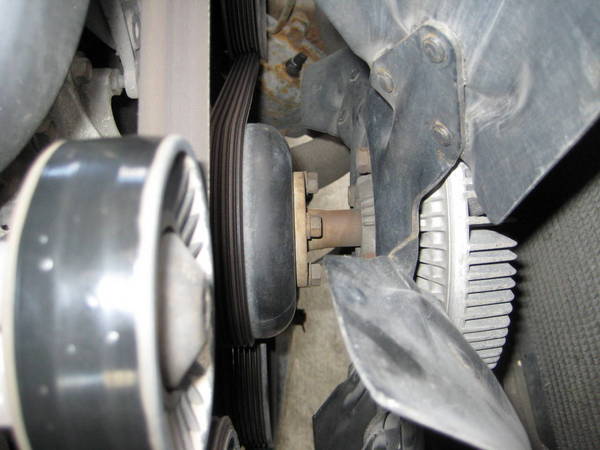
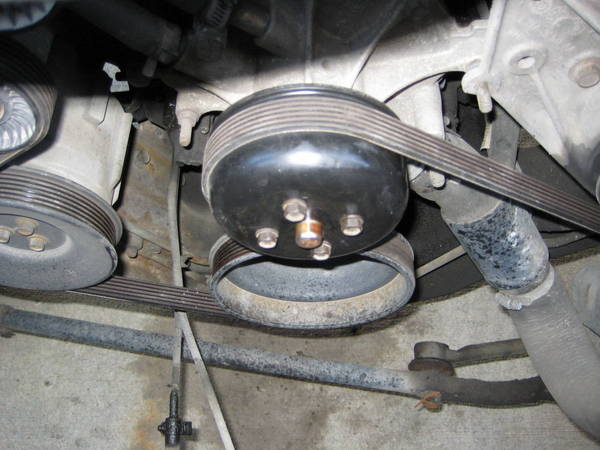
Step 2: Remove the fan from the pulley.
The fan has 4 bolts attaching it to the pulley. The four bolts that need to be removed are the ones pictured. Save these bolts! You'll need them soon.
Step 3: Remove the shroud and fan.
These two parts are a little bit of a handful when removing them. You may find it easier to take them out together since it's such a tight fit. I was *barely* able to sneak the fan out from under the shroud and it was easier for me to handle them one at a time. The fan fit by pushing the shroud as close to the engine, and pulling the fan out the side closest to the radiator.
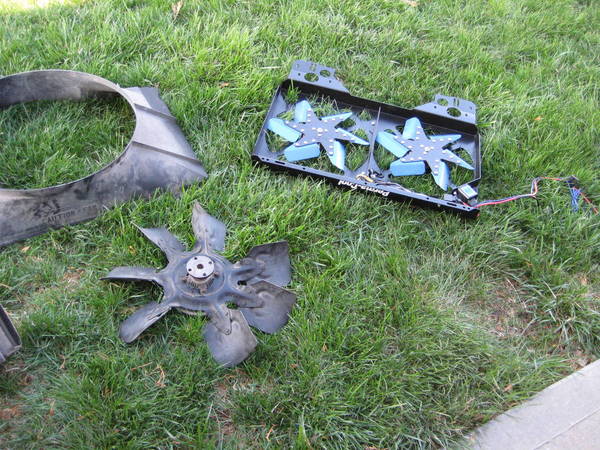
Step 4: Admire the parts
The old parts are historical and admire the new fan. You paid enough for it to stand there in awe for a few minutes.
Step 5: Admire the huge space in the engine bay.
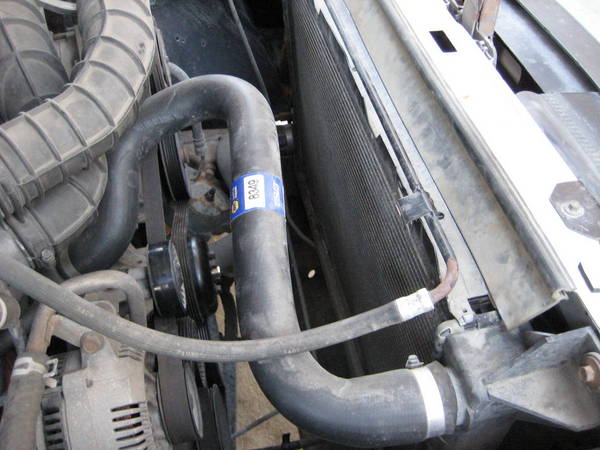
The thermal probe will be inserted into the radiator. I put mine about 4" from the top center of my radiator core. It worked well RIGHT out of the box since the new fan is set to 195*F.
Step 6: Replace pulley and bolts.
The pulley needs to be replaced and the belt put back on. Spacers were not needed and there seemed to be plenty of clearence for the bolts without the flange that the fan was mounted on.
Replace your bolts, and replace your belt.
Step 7: Pysically install the new fan.
This puppy just FALLS into place. It's a perfect fit. Make sure you get all of your cables and wires accessible for electrical installation shortly. Before you bolt it down, make sure you got your probe in the correct position in the radiator. The other 3 cords that need to be free are your 12v lead, your ground, and a blue lead that is used to tap into the air conditioner compressor switch.

Step 8: Attach your ground & 12v lead.
This is a simple step. The terminals are already attached. Put your 12v on your battery, and your ground on the driver side radiator support bolt near the top front of the grille.
Step 9: Tap into the AC Condensor switch.
Located on the side of the condensor, there is a wire harness that you need to tap to make sure this fan comes on if the air conditioner is on.
Step 10: take a small straight edge screwdriver and let your truck warm up. Adjust the temperature in with the variable switch located in the top passenger side corner of the new fan.
You're good to go! Enjoy!
I noticed a marginal power increase. This isn't a bogus claim. I'd do it again, without a doubt!
Ryan
Anyway, the item is basically a dual 13" electric fan setup with an onboard thermostat controller. The fan has a 'probe' to detect temperature by inserting it into the radiator core.
Step 1: Figure out what needs to happen.
The shroud and fan are in place and take up almost all of the room in the front of the engine bay. In removal, you'll have to figure out how to remove the fan from the pulley and remove the shroud from the engine bay.
That's what it looks like before...
Step 2: Remove the fan from the pulley.
The fan has 4 bolts attaching it to the pulley. The four bolts that need to be removed are the ones pictured. Save these bolts! You'll need them soon.
Step 3: Remove the shroud and fan.
These two parts are a little bit of a handful when removing them. You may find it easier to take them out together since it's such a tight fit. I was *barely* able to sneak the fan out from under the shroud and it was easier for me to handle them one at a time. The fan fit by pushing the shroud as close to the engine, and pulling the fan out the side closest to the radiator.
Step 4: Admire the parts
The old parts are historical and admire the new fan. You paid enough for it to stand there in awe for a few minutes.
Step 5: Admire the huge space in the engine bay.
The thermal probe will be inserted into the radiator. I put mine about 4" from the top center of my radiator core. It worked well RIGHT out of the box since the new fan is set to 195*F.
Step 6: Replace pulley and bolts.
The pulley needs to be replaced and the belt put back on. Spacers were not needed and there seemed to be plenty of clearence for the bolts without the flange that the fan was mounted on.
Replace your bolts, and replace your belt.
Step 7: Pysically install the new fan.
This puppy just FALLS into place. It's a perfect fit. Make sure you get all of your cables and wires accessible for electrical installation shortly. Before you bolt it down, make sure you got your probe in the correct position in the radiator. The other 3 cords that need to be free are your 12v lead, your ground, and a blue lead that is used to tap into the air conditioner compressor switch.
Step 8: Attach your ground & 12v lead.
This is a simple step. The terminals are already attached. Put your 12v on your battery, and your ground on the driver side radiator support bolt near the top front of the grille.
Step 9: Tap into the AC Condensor switch.
Located on the side of the condensor, there is a wire harness that you need to tap to make sure this fan comes on if the air conditioner is on.
Step 10: take a small straight edge screwdriver and let your truck warm up. Adjust the temperature in with the variable switch located in the top passenger side corner of the new fan.
You're good to go! Enjoy!
I noticed a marginal power increase. This isn't a bogus claim. I'd do it again, without a doubt!
Ryan
Last edited:


