PDA

View Full Version : Follow Along As I Build A 400


393clevor
07-16-2009, 08:18 AM
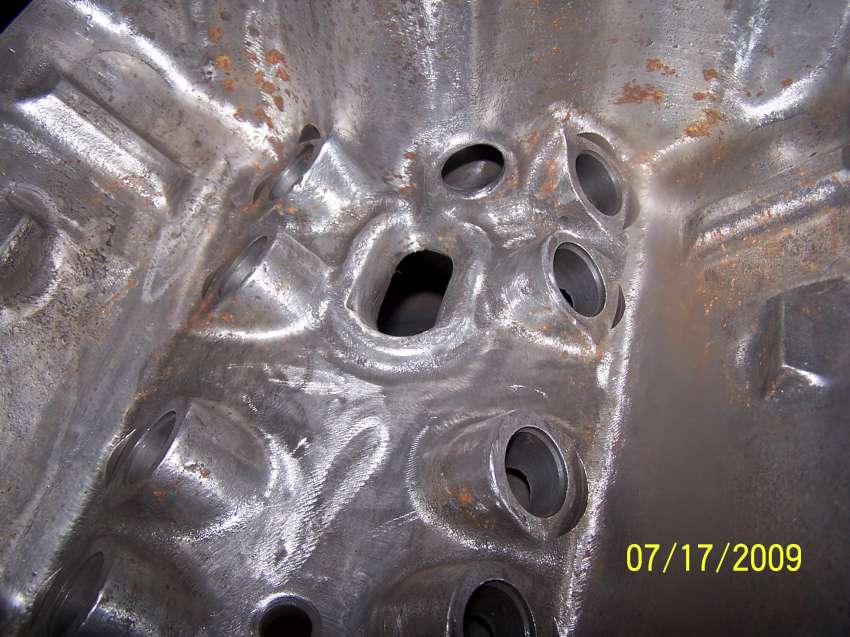
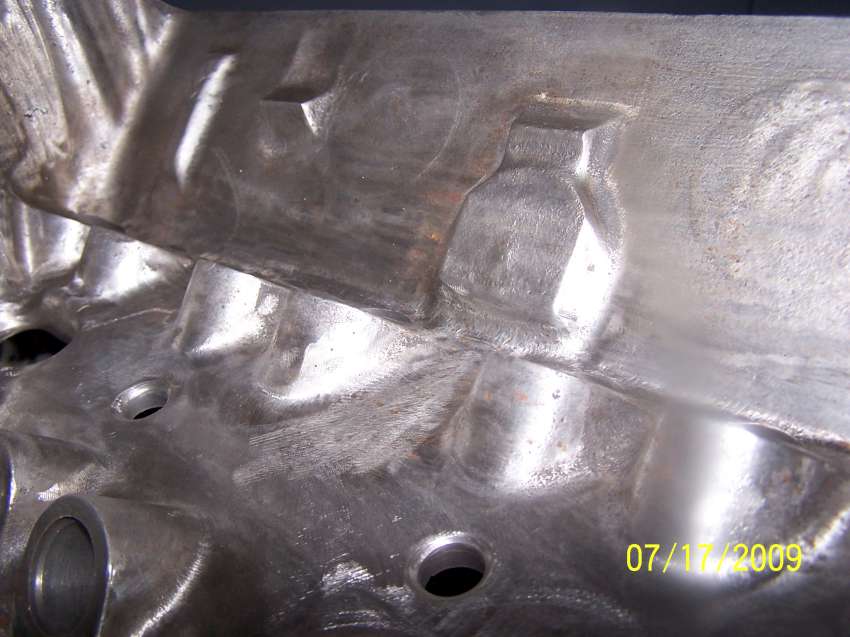
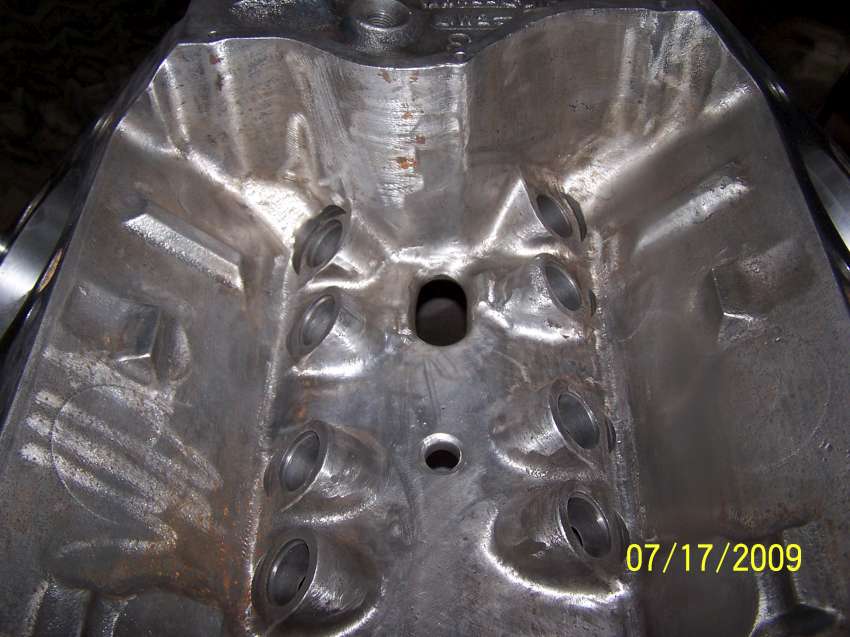
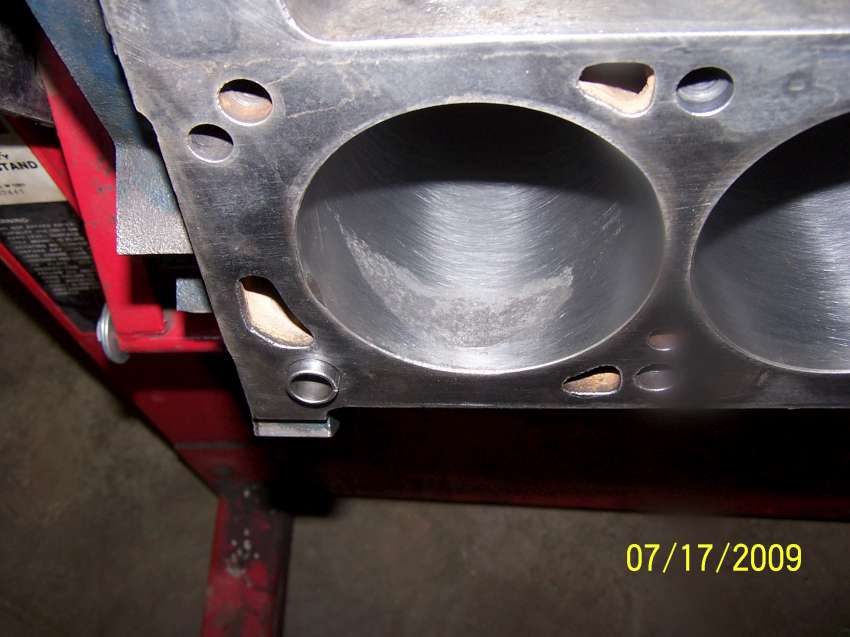
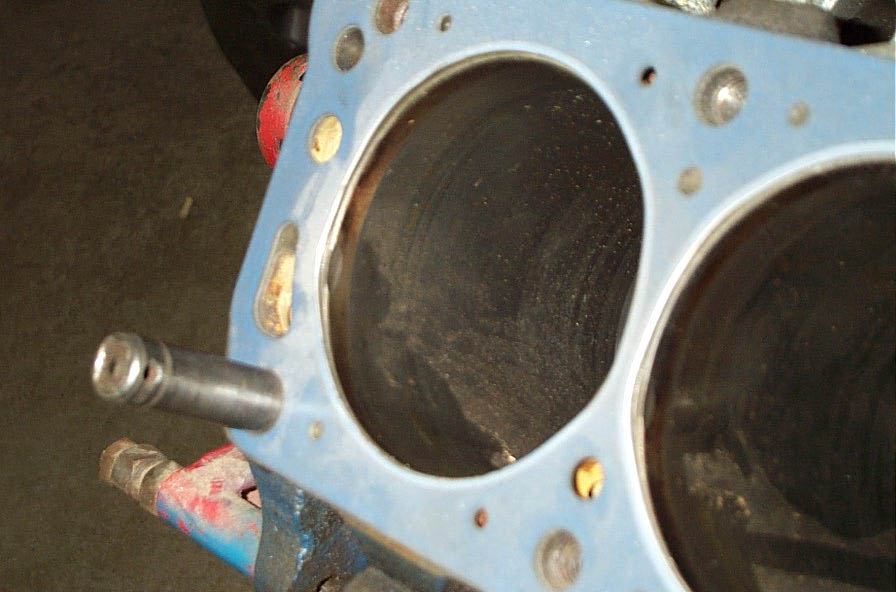
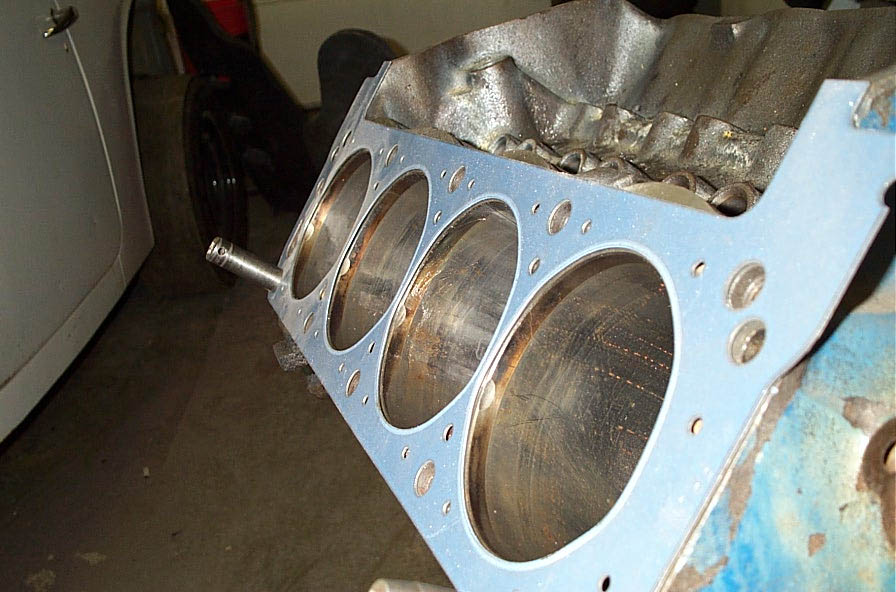
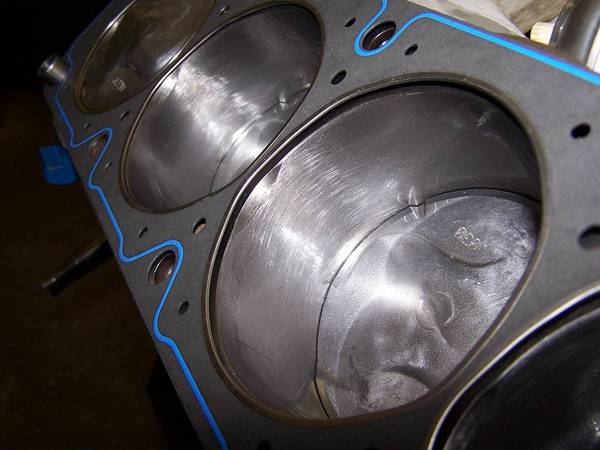
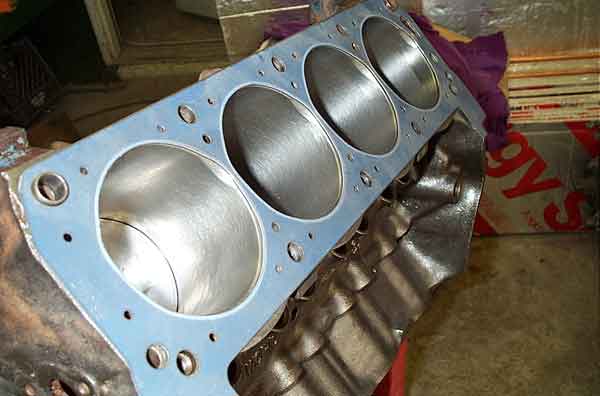
I got the Block, Crank, Rods and pistons back from the machine shop today and will start putting her together. I should have the heads in a few day.

Hopefully the customer has got the bearings and gaskets needed to start the build. I hate it when they buy the parts, most of the time there wrong and it just waists my time, will see.


I hope some of you will find this of some interest... smiliegitrdone

dragogt
07-16-2009, 08:59 AM
What all are they having done to it?

O'Rattlecan
07-16-2009, 10:25 AM
Keep this thread updated! I look foward to watching it progress.

Ryan

393clevor
07-16-2009, 10:59 AM
What all are they having done to it?

Well lets see. By the way this is a budget build for sure. the block should have been bored or replaced(bad rust in #4 I think), the crank was already turn .010 .010 so I just had it polished... Plus I'm using some 351W main bearing I had laying around from a previous build, had maybe 10 minutes run time on them.

I ported a set of 74 351C heads (much better exhaust port than the 75 351M/400 heads) with one piece ss 2.07 and 1.65 valves, cleaned up the chambers and polished them. Also cleaned up the oil return path under the covers. I'll have to cc the chambers once I get them back, might have to mill them, not sure.

ground and polished the lifter valley for better oil return to the pan

Piston are (Step Dish) Hypereutectic 1.720" C.H.
Part number TMI/KB2347-30
web site http://www.tmeyerinc.com/cart400pistons.htm

ARP Rod Bolts, stock rods

cam kit with 204 214 @.050 duration

Cloyes timing set

Comp Cams retainers and locks, stock rockers and push rods

performer 4v intake

Holley 600vs carb

Duraspark distributor re curved, MSD box and coil

Long tube 1-3/4 headers

I'll be sure to post pics as I go

DNFXDLI
07-16-2009, 11:31 AM
Are you going to use a stud kit for the main caps?

dragogt
07-16-2009, 11:52 AM
I didn't know that M/W mains were interchangeable.

It does sound like a budget build for sure, how bad is /was the rust in that cyl?

393clevor
07-16-2009, 01:03 PM
Are you going to use a stud kit for the main caps?

Nope...........

393clevor
07-16-2009, 01:08 PM
I didn't know that M/W mains were interchangeable.

It does sound like a budget build for sure, how bad is /was the rust in that cyl?

Ya they are the same main bearing and the cylinder is bad, if it were mine I would look around for another block and bore it .030 but this guy is tight...

He is buying parts before I can check to see what he needs, would have been nice to get .040 pistons and rings.

dragogt
07-16-2009, 02:56 PM
Kinda like, putting the cart before the horse ant it?

393clevor
07-16-2009, 03:21 PM
Kinda like, putting the cart before the horse ant it?

It's happened before, I built a 302 for a guy and he bought a engine kit before I had a chance to check it out... needed the crank turned and the block bored... needless to say he had to return it and get another one.


Just got back from the shop... no gaskets and NO rod bearings... guess I'll start on it when I have the rod bearings... Oh shiiit I should have asked about the oil pump... might just use the old one ..

dragogt
07-16-2009, 03:35 PM
Bet it gets expensive doing it that way, Ah well live and learn.

393clevor
07-17-2009, 06:58 PM
Ok to the shop this morning and started doing whatever I could.. no rod bearings or gaskets yet!!!!

Started with the distributor, I set the mechanical advance for 20* so I can set initial to 16 to 18... will see how it likes that. I also took the bigger fat spring out and put just enough tension on the smaller spring to keep it against the stop.

I filled the slot to .410
http://www.fordtruckfanatics.com/gallery/data/617/100_7816-850.jpg

http://www.fordtruckfanatics.com/gallery/data/617/100_7818-850.jpg

http://www.fordtruckfanatics.com/gallery/data/617/100_7819-850.jpg

http://www.fordtruckfanatics.com/gallery/data/617/100_7821-850.jpg


Next I took a heat sink from an old computer and ground it down flat so I could install a HEI module for the ignition system. I have had this kit for about 6 years sitting in a box so I decided to give it to Eric for his truck.

http://www.fordtruckfanatics.com/gallery/data/617/100_7824-850.jpg

http://www.fordtruckfanatics.com/gallery/data/617/100_7830-850.jpg

http://www.fordtruckfanatics.com/gallery/data/617/100_7832-850.jpg

http://www.fordtruckfanatics.com/gallery/data/617/100_7871-850.jpg

That should keep it cool...


Next I happen to notice the 400 performer intake in the corner and it looked like it had rectangle ports, for a minute I thought it was thew wrong intake but it's not... WTF why did they make an intake with rectangle ports for a head that has oval ports... I'm thinking of opening up the intake to match the heads, it's not like I'm making a bulge in the runner like you would if you were gasket matching the same shape port. I would be simply blinding the intake port to the bigger port in the head.

What are your thought on this???

http://www.fordtruckfanatics.com/gallery/data/617/100_7827-850.jpg

http://www.fordtruckfanatics.com/gallery/data/617/100_7826-850.jpg

http://www.fordtruckfanatics.com/gallery/data/617/100_7822-850.jpg


Here is a few pics of the lifter valley, I ground it down to a shine and grooved the sides to let the oil return faster to the drain hole in the middle, witch had a huge hump all the way around it???

I wish I had got some pictures before I started on it......

http://www.fordtruckfanatics.com/gallery/data/617/100_7836-850.jpg

http://www.fordtruckfanatics.com/gallery/data/617/100_7835-850.jpg

http://www.fordtruckfanatics.com/gallery/data/617/100_7834-850.jpg

http://www.fordtruckfanatics.com/gallery/data/617/100_7833-850.jpg

This is the bad cylinder... can you say budget build....lol

http://www.fordtruckfanatics.com/gallery/data/617/100_7852-850.jpg

He walked into the shop just before I was leaving with the gaskets and bearing so I'll have something to do tomorrow...


What are your thought on the valley pan gasket?

I don't like them cause it makes it harder to gasket match the intake...

See you tomorrow. Steve

Eagle-460
07-17-2009, 07:22 PM
Ugh, I wouldn't even build the engine if the guy doesn't even want to spend the money to do the job right the first time! It going to cost him more money in the future, and he won't have a very reliable and long lasting engine. If you build engines for people on a regular basis, you might receive some bad rep because the engine didn't last long, due to the customer being a cheap @ss! I'm sure you do good work, and you want to keep it that way.

Remove the rust from the lifter valley and apply some motor oil to the valley to stop rust from forming. That crap will get in your motor. Otherwise your cleaning up of the valley looks good. Do NOT re-use the oil pump as I'm sure its seen a lot of wear. A stock replacement is cheap and is good insurance against problems.

hollenjoe
07-17-2009, 07:27 PM
the rough spot is where the rusted part was??, i hope this was before the overboring was done....

393clevor
07-18-2009, 05:41 AM
A little history...

The motor was rebuilt a while ago hence the .030 over bore and the .010 X .010 crank. When he got it the motor was stuck, a little effort with a breaker bar and lube and he got it to turn over. It ran good didn't smoke or rap had good oil pressure.

He bought the pistons before I noticed the rust in the #4 hole, sucks to build it like this but it's going together. The pic is after a honing it's going to have to be good enough cause he's not boring the $$$$ is not there.


I've got some more grinding to do to the block so I left the valley dry until I'm done grinding. I have to relieve the the bores for the intake valves. When I ported the heads I un-shrouded the intake valves so I have to do the same to the block. No sense doing the heads if your not going to do the block.

When I built my Clevor (351C heads on a 351W) the exhaust valves were rubbing on the cylinder walls. I never read anything online about relieving the bores for the valves on a Windsor block, live and learn.

http://www.fordtruckfanatics.com/gallery/data/618/Untitled-1.jpg

http://www.fordtruckfanatics.com/gallery/data/618/Untitled-3.jpg

After I relieved the block...

http://www.fordtruckfanatics.com/gallery/data/618/medium/100_4172.jpg

http://www.fordtruckfanatics.com/gallery/data/618/exhaust-clearance1.jpg

The 400 block has reliefs cut into the block already but the intake relief needs to be matched to the gasket like I did the chambers in the heads. It don't take much time to do and it should make for better flow into the cylinder...


I should have some updates later tonight, not sure how much I'll get done today I smashed my thumb with a 3lbs hammer yesterday.

flareside_thunder
07-18-2009, 06:42 AM
what car is that in pic number two of the first series of pics on this page???

m78
07-18-2009, 06:51 AM
At 1st glance I thought it was a clothes dryer, then I saw the tire:rolling laugh: :rolling laugh:

393clevor
07-18-2009, 08:33 AM
It's a 1961 PV544 Volvo I use to own. I put a EFI B21 198? engine and trans in it. Then I cut it up to make a racer out of it, never finished it I got Divorced and had to sell it.

http://www.fordtruckfanatics.com/gallery/data/618/front_driving.jpg

http://www.fordtruckfanatics.com/gallery/data/618/side_drivivng.jpg

393clevor
07-18-2009, 08:34 AM
Looks like a 47 ford from the front....

hollenjoe
07-18-2009, 08:44 AM
How did you know you had your valves rubbing against your cylinder walls?

I guess if your rings are sealing its fine, but No4 cyl ring could worn faster....

393clevor
07-18-2009, 09:20 AM
How did you know you had your valves rubbing against your cylinder walls?

I guess if your rings are sealing its fine, but No4 cyl ring could worn faster....

The engine had some problems and I didn't know they were rubbing until I tore it down, the Ex. guides on that head were junk as well. Funny thing is they didn't rub on the other bank???

Not to worried about that rusted cylinder, it's going into a mud truck and will be hammered on when it's running. Might smoke a bit from time to time he'll just have to deal with it.

hollenjoe
07-18-2009, 03:07 PM
ajajaj, those pistons look like 302 clevor based boss pistons..

TexasNomad
07-18-2009, 03:19 PM
Kick *** build man, what do you use to do all the grinding in the valley?

393clevor
07-18-2009, 03:33 PM
ajajaj, those pistons look like 302 clevor based boss pistons..


Those are 351clevor pistons, I don't think you can buy them any more, they have the valve reliefs for the cantered valve head like the Cleveland. I think I bought those at Flatlanders.

393clevor
07-18-2009, 03:44 PM
Kick *** build man, what do you use to do all the grinding in the valley?

I use all the stuff I port with but most of the flat surfaces in the valley I used my little die grinder, the kind that has the screw on pads. I use the 60 grit paper pads to get the heavy stuff then I use the sand rolls to a polish.

http://www.fordtruckfanatics.com/gallery/data/618/My-Tools.jpg

393clevor
07-18-2009, 04:04 PM
Well I got as far as putting the rings on the pistons and with my new thumb injury it will have to wait until I get to my other tool box so I can grab my ring expander... I got the block relieved for the intake valves and installed the crank. The ring gap was more than enough and the clearance on the mains were with in .001 to .003...

Look at the block where the gasket has the relief for the other bank were I didn't relieve it. You can see why I do this the incoming intake charge would slam right into the top of the block making all kinds of turbulence.

http://www.fordtruckfanatics.com/gallery/data/617/100_7883-850.jpg

Here you can see that I stayed up higher than were the top ring stops at TDC.

http://www.fordtruckfanatics.com/gallery/data/617/100_7882-850.jpg


Crank in

http://www.fordtruckfanatics.com/gallery/data/617/100_7888-850.jpg


I'll be back at it on Monday although I might have a new job and I have to get my ring expander..

F 150Cobra
07-18-2009, 04:06 PM
great build!!! good luck :)

hollenjoe
07-18-2009, 04:21 PM
Looking nice, hey what caused the bad cyllinder rust? I ask cuz i had one that rsuted exactly in the same spot, but couldnt figure why it got rusty, the engine was completely built and coulnt find anything that could start the rust...

393clevor
07-18-2009, 04:25 PM
Seems to me water got into it some how... don't know??

Raptor22
07-18-2009, 04:26 PM
Looking fantastic man. :)

hollenjoe
07-18-2009, 04:28 PM
hmmm I thought it llathough it seamed strange, maybe thru the carb and into any cylinder with an open intake valve at the time.... who knows it was a mistery...

TexasNomad
07-18-2009, 05:04 PM
Damn why can't there be any engine builders like you around where I live, Lubbock is full of nothing but rooks.

TexasNomad
07-19-2009, 04:33 PM
Also is that giant heat shrink really necessary for that coil?

393clevor
07-19-2009, 05:29 PM
No but it was all I had, you have to keep it cool some how. Here is some info on what I'm doing with the ignition.

http://street2mud.com/webfiles/%2775%20V8%20Prestolite%20to%20Duraspark%20Distrib utor.pdf


That is a HEI module it's going to take the place of the ignition box that ford used with the duraspark distributors. Lots cheaper to replace than the ford box and from what I've heard it's a better unit.

more info on re-curving the timing

http://www.reincarnation-automotive.com/Duraspark_distributor_recurve_instructions_index.h tml

TexasNomad
07-19-2009, 06:02 PM
Hey thats awesome! i've never seen that done before.
But what better about doing this then just going with a HEI style dizzy?

393clevor
07-19-2009, 08:00 PM
Hey thats awesome! i've never seen that done before.
But what better about doing this then just going with a HEI style dizzy?

Money i guess, plus you can tune the duraspark real easy. I never used a HEI style dizzy, not sure how to tune one or how hard it is. Plus you can use what ever coil you want with the duraspark. The most impotent thing is with a HEI type distributor on a ford it looks like the motor is in backwards..lol

TexasNomad
07-19-2009, 08:07 PM
I have one of my trucks only for the reason keeping the bay cleaner looking, less wires and box's and I got them for real cheap ;)
BTW what does "WhippleSurvivor" mean? is that like some kinda wine?

393clevor
07-19-2009, 08:15 PM
I wish!

http://www.mayoclinic.org/pancreatic-cancer/whippleprocedure.html

TexasNomad
07-19-2009, 08:19 PM
Oh ah ee.. Sorry.. :( I thought it was some thing funny..

393clevor
07-19-2009, 08:21 PM
Oh ah ee.. Sorry.. :( I thought it was some thing funny..

No problem ... just glad to be on the right side of the grass...lol

TexasNomad
07-19-2009, 08:23 PM
heck yeah Air kicks *** :D

393clevor
07-21-2009, 11:16 AM
Got the tools I need to keep going, just haven't felt to good the past two days. Hopefully I'll be back at it tomorrow...

I'll be sure to update when I have one.

TexasNomad
07-21-2009, 01:07 PM
its a awesome Build, the more i read about the 351m/400 the more I think the 460 isn't the best choice for what I want..

393clevor
07-22-2009, 08:07 PM
its a awesome Build, the more i read about the 351m/400 the more I think the 460 isn't the best choice for what I want..


Your not the first person I've heard say that
460 has a 3.85 stroke I think
the 400 has a 4.00 inch stroke, only thing that sucks is the intakes are limited unless you use adapters and run a 351C intakes,,, dime a dozen

F 150Cobra
07-22-2009, 08:37 PM
what about a 351W is it good for a 393 stroker or 408 ?

393clevor
07-24-2009, 04:35 AM
OK I got back at it the other day, still waiting on parts. I rechecked the ring gap and had to open the top ring from .023 to .026 the second ring was .014 so all is good there. Waiting for new HV oil pump and the heads.

check out the new pistons, they land right at 0 deck perfect that should up the compression.
http://www.fordtruckfanatics.com/gallery/data/617/100_7910-900.jpg

http://www.fordtruckfanatics.com/gallery/data/617/100_7911-900.jpg

Got the cam, timing set, water pump installed... I use the ARP assembly lube on the cam, it's thick and stays where you put it. I'll put some on the bottom of the lifters as well.

http://www.fordtruckfanatics.com/gallery/data/617/100_7913-900.jpg

393clevor
07-26-2009, 03:01 PM
Ok I got the heads back from the shop, they needed 4 or 5 guides so I have to trim the guides back in the bowls.

Here's a few pics of the heads after I started on the exhaust ports.
Notice the deep grooves in the chambers around the seats, if left as is it would create a bunch of turbulence coming in and going out.

http://www.fordtruckfanatics.com/gallery/data/617/000_0081-900.jpg

http://www.fordtruckfanatics.com/gallery/data/617/000_0091-900.jpg

This pics shows the groove free chamber around the seat

http://www.fordtruckfanatics.com/gallery/data/617/100_7984-9001.jpg

These pics show how I opened up the oil return path to the drain holes in the heads.

http://www.fordtruckfanatics.com/gallery/data/617/100_7956-900.jpg

http://www.fordtruckfanatics.com/gallery/data/617/100_7955-900.jpg

http://www.fordtruckfanatics.com/gallery/data/617/100_7953-900.jpg

This is the D5 Exhaust post found on most 351M/400 it is very restrictive. The heads I used are 74 351C 2V heads they have a must better exhaust port.

D5 Exhaust Port

http://www.fordtruckfanatics.com/gallery/data/617/100_7869-900.jpg

http://www.fordtruckfanatics.com/gallery/data/617/100_7865-900.jpg

http://www.fordtruckfanatics.com/gallery/data/617/headcros_stock-850.jpg

Here is the 351C 2V after some porting

http://www.fordtruckfanatics.com/gallery/data/617/100_7968-900.jpg

http://www.fordtruckfanatics.com/gallery/data/617/100_7975-900.jpg

http://www.fordtruckfanatics.com/gallery/data/500/100_7980-900.jpg

http://www.fordtruckfanatics.com/gallery/data/500/100_7982-900.jpg

intake port bowl before

http://www.fordtruckfanatics.com/gallery/data/617/100_7866-900.jpg

Intake port bowl after


http://www.fordtruckfanatics.com/gallery/data/617/100_7969-900.jpg

http://www.fordtruckfanatics.com/gallery/data/617/100_7970-900.jpg

http://www.fordtruckfanatics.com/gallery/data/617/100_7957-900.jpg

Wow I got lost in this post.... The heads will be done on Monday he has to set the spring height and finish the 3 angle valve job so I should have it done ether Monday night or Tuesday... I'm still looking for a junk big block C6 so I can cut the bell off it and mount the engine to my stand and run it before I put it in the truck.

F 150Cobra
07-26-2009, 03:05 PM
wow.. coollll o should send u my GT40 heads for u to port them :)

393clevor
07-26-2009, 03:12 PM
wow.. coollll o should send u my GT40 heads for u to port them :)

OK you pay the shipping plus 200.00 and I'll port them for you.

TexasNomad
07-26-2009, 03:48 PM
Wow man!
I want you to build me a engine..lol :D

flareside_thunder
07-26-2009, 05:06 PM
OK you pay the shipping plus 200.00 and I'll port them for you.

That's not a bad quote.....I got quoted the same by a buddy of mine.That build is lookin good man.

m78
07-26-2009, 05:25 PM
post a picture of the tools you usd

393clevor
07-26-2009, 06:25 PM
post a picture of the tools you usd

Here you go.. I've been doing it a while. I just started doing some 351W D0OE heads for my! mud truck... this time I got crazy and installed some brass tubes in the push rod holes so I could open the inlet as much as possible.

http://www.fordtruckfanatics.com/gallery/data/618/My-Tools.jpg

393clevor
07-26-2009, 06:26 PM
That's not a bad quote.....I got quoted the same by a buddy of mine.That build is lookin good man.

Thanks I wish it were mine I would have done it right....

flareside_thunder
07-26-2009, 07:13 PM
Hey mind if I ask what the plumber's putty is for?

393clevor
07-26-2009, 07:28 PM
I use it to protect the inside of the brass tubing from filling up with JB Weld. I drilled the push rod holes to an even 9/16 diameter, half the hole is 9/16 and the other half is a little smaller. Once it's an even 9/16 I hone the hole with a ball hone to clean it. Then port the inlet to where it's just starting to brake through into the push rod hole evenly the all the way across.I clean every thing with some lacquer thinner then I mix up some JB Weld and cover the brass tube and the inside of the push rod hole, ball up some plumbers putty and fill the end of the brass tube with it. Push it through the hole and the plumbers putty keeps the JB Weld from getting inside the brass tubing. I read how to do this on a site somewhere I'll look for the link and post it for ya...

flareside_thunder
07-26-2009, 07:29 PM
Hmm, cool theory.

393clevor
07-26-2009, 07:47 PM
http://www.diyporting.com/Sleeves.html

flareside_thunder
07-26-2009, 07:52 PM
Ahhh, that's cool.

money_pit
07-27-2009, 10:32 AM
I would psi test a head before doing all that port & chamber work.

393clevor
07-27-2009, 03:59 PM
I would psi test a head before doing all that port & chamber work.

That was the first thing I had done to the heads.

393clevor
07-27-2009, 08:51 PM
I'll have the heads tomorrow morning for sure I hope! I got the oil pump ready to go in when I noticed the pump shaft didn't have the locking retainer (or whatever you call it) on it. Luckily my machinist had a few kicking around. So after I went and got that I installed the pump. Started to clean up the pan and there it was ... a nice little hole... WFT am I ever going to get this motor together? This pan is freeeckin junk!!! As luck would have it the junk yard next door had a 400 setting under the bench, I pulled it off and went back at it. I think I might buy or barter with Brian and get that 400. I have another good set of 75 351C 2V heads so just maybe just maybe???

http://www.fordtruckfanatics.com/gallery/data/617/100_7994-900.jpg

http://www.fordtruckfanatics.com/gallery/data/617/100_7993-900.jpg

http://www.fordtruckfanatics.com/gallery/data/617/100_7990-900.jpg

http://www.fordtruckfanatics.com/gallery/data/617/100_7996-900.jpg


Should have it done tomorrow...


By the way it normally takes me about 5 to 6 hours to put one together, this one has been a nightmare. Something about having the customer buy the parts...!!


Though I would show the difference in a stock oil pump and a HV pump....


http://www.fordtruckfanatics.com/gallery/data/617/100_7989-900.jpg

TexasNomad
07-27-2009, 10:11 PM
Its soo preedy :D

dragogt
07-28-2009, 06:50 AM
may just be me, but I don't see a difference other than the color..

393clevor
07-28-2009, 07:52 AM
may just be me, but I don't see a difference other than the color..


Look at where the gears would be inside the housing... it most be 25% bigger.

dragogt
07-28-2009, 08:00 AM
Ok roger I see it now, dk how I missed it b4...

393clevor
07-28-2009, 08:08 AM
I really don't like using them on a new rebuild where the clearances are tight, all it would do is push most of the oil around the pressure regulator (because it's got nowhere else to go) and create heat. But this build I am using Speed Pro 3/4 groove racing main bearings and the clearances are on the loose side so a little more volume won't hurt.

dragogt
07-28-2009, 08:16 AM
Just a "Q" but why build "loose" won't it loosen up after break in anyway?

393clevor
07-28-2009, 08:27 AM
I like to go a little loose on the mains when they are as large as the 351W 351M/400 3" mains.... I had no choice on this build the crank was turned .010 before I got it, when I checked the clearance it was on the loose side of the tolerances. The big 3" mains are know for trouble at high rpms that's why the higher rpm Cleveland's have smaller mains, lot of people will machine the 3" cranks to the Cleveland mains for this reason. When I built the Clevor I went loose on the mains and used a HV pump.

393clevor
07-29-2009, 04:53 AM
Got it together yesterday.......

First thing I did was cc the chambers I checked 3 chambers and they were to my surprise 78cc...

http://www.fordtruckfanatics.com/gallery/data/617/100_8006-900.jpg


few pics of the un-shrouded valves


http://www.fordtruckfanatics.com/gallery/data/617/100_8009-900.jpg

http://www.fordtruckfanatics.com/gallery/data/617/100_8010-900.jpg

http://www.fordtruckfanatics.com/gallery/data/617/100_8007-900.jpg

Next I bolted the heads on....

http://www.fordtruckfanatics.com/gallery/data/617/100_8011-900.jpg

http://www.fordtruckfanatics.com/gallery/data/617/100_8012-900.jpg

Then I installed the rockers... one thing that's bugging me is half oil deflectors that go under the bolts were broke so I didn't install them. Not sure if that's going to be a problem or not. Then I noticed the valve covers he bought don't have any baffles in them so I think I'm going to use the old tin ones.

http://www.fordtruckfanatics.com/gallery/data/617/100_8014-900.jpg


All done, I have to pull the carb apart and clean it, it's been sitting awhile. Trying to talk him into a Holley, like to see a 700cfm or better on it.

http://www.fordtruckfanatics.com/gallery/data/617/100_8016-900.jpg

http://www.fordtruckfanatics.com/gallery/data/617/100_8017-900.jpg


i got a video of priming the oil system and I'll have one of the cam brake in.. just need to post the videos on YouTube...

393clevor
07-29-2009, 05:14 AM
Priming the oil system

<object width="425" height="344"><param name="movie" value="http://www.youtube.com/v/cPdi9DEkFGE&hl=en&fs=1&"></param><param name="allowFullScreen" value="true"></param><param name="allowscriptaccess" value="always"></param><embed src="http://www.youtube.com/v/cPdi9DEkFGE&hl=en&fs=1&" type="application/x-shockwave-flash" allowscriptaccess="always" allowfullscreen="true" width="425" height="344"></embed></object>


Here's another video of my 351Clevor.. In this video the system is dry I just added oil and started turning the drill (CCW). You can see how long it takes for the oil to reach the rockers.

<object width="425" height="344"><param name="movie" value="http://www.youtube.com/v/QZmd3l4AT58&hl=en&fs=1"></param><param name="allowFullScreen" value="true"></param><param name="allowscriptaccess" value="always"></param><embed src="http://www.youtube.com/v/QZmd3l4AT58&hl=en&fs=1" type="application/x-shockwave-flash" allowscriptaccess="always" allowfullscreen="true" width="425" height="344"></embed></object>

TexasNomad
07-29-2009, 01:49 PM
I"ve heard that 351M/400 are notorious for having bad oil flow how do you get around that?

393clevor
07-29-2009, 04:20 PM
I found this a while ago, I was going to do it but said **** it his getting enough for the money I'm charging him

http://www.tmeyerinc.com/400Fordpg1.htm

Last item we did for the oil pressure was to block the #1 main bearing feed hole. This is a procedure we normally do with our racing small blocks. The #1 main receive oil pressure from not only 1 hole, but 2. So by blocking 1 hole this will help conserve oil pressure for the other bearings. Now we would open the hole that would feed the cam bearing to the same size as #2-5 main bearing feed hole. This size should be 5/16" and go about 1" deep to just intersect the main feed line. Please if you have any questions about this feel free to call or Email me about this.

TexasNomad
07-29-2009, 06:24 PM
Wow, you really know stuff...
Do you run a shop or do this on the side?

393clevor
07-29-2009, 06:46 PM
I use to have a shop but now I just do it on the side and for myself. That last reply was from the site I linked, I found that when I was looking for the pistons.

393clevor
07-29-2009, 08:23 PM
I got to it this morning making some baffles for the Holley valve covers that didn't have any. Found some old rocker panels in the corner of the shop and cut one up for the baffles.

http://www.fordtruckfanatics.com/gallery/data/617/100_8018-900.jpg

http://www.fordtruckfanatics.com/gallery/data/617/100_8020-900.jpg

http://www.fordtruckfanatics.com/gallery/data/617/100_8021-900.jpg

Threaded the holes and with a little locktyte had some usable valve covers


http://www.fordtruckfanatics.com/gallery/data/617/100_8024-900.jpg


Next I cleaned out the Edelbrock 600.. had a bunch of dirt in it and the bottom of the accelerator pump bore was full too. got it all cleaned up and back on.

http://www.fordtruckfanatics.com/gallery/data/617/100_8026-900.jpg

I wish he would spring for a Holley so I could tune it!!! I got a couple kicking around I might just let him use one for the mud run this Saturday.

I got the HEI ignition wired up and working, the motor setting in the truck with the help from some of the boys in the shop. It'll be running tomorrow.

http://www.fordtruckfanatics.com/gallery/data/617/100_8027-900.jpg

I wanted to use my engine stand so I could run it while braking in the cam but I couldn't find a junk big block C6 to cut up for the bellhousing. This is the stand I use for running engines before they go in the vehicle, makes it a lot easier to change a wiped out cam and lifter. When I built my Clevor shown on the stand running I had to tear it back apart and have it line bored... never put an engine together with out plastic-gauging the bearing, I was in a rush and learned a valuable lesson!

http://www.fordtruckfanatics.com/gallery/data/618/100_5582-900.jpg

TexasNomad
07-29-2009, 09:37 PM
Where ya from is you don't mind be asking?

393clevor
07-30-2009, 03:46 AM
I live in Pittsfield NH, and believe me it's the Pitts.

393clevor
07-30-2009, 08:44 PM
Finally got it running tonight but I left my camera at the shop.I got the cam broke in with a few mishaps, had to shut it down twice kept over heating. I think I'm going to open up the mechanical advance slot to 26* so I can bring down the initial timing 6* from where it is, I still have to play with it a some.

I found some more horsepower laying in the corner of his shop in the form of a crank pulley. It came from a SBC a good 30% smaller than that giant stock 400 pulley. I had to do some tweaking but I got it to work. I remember once I built a 302 that turned 6500rpms for a Mustang II, the first time it went to red line it sized the alternator tight. The crank pulley must have been 8" in diameter you can only imagine how fast the alternator and water pump were spinning at 6500. Now I always try and find a smaller crank pulley when I build an engine that spins higher then stock. It's free horsepower!!

hollenjoe
07-30-2009, 10:10 PM
Do you know why did it overheat_? Maybe some air pockets in the system?

393clevor
07-31-2009, 02:59 AM
Maybe... I didn't have a thermostat in it just a fender washer in place of the thermostat with a 1" hole in it. The idea was to slow the water down enough to cool it and keep it from getting air bound. Guess I should have went with a smaller hole i don't know. Today I'm going to put a 165* thermostat in and run it some more before I change the oil see what happens who knows maybe the radiator is clogged some????

hollenjoe
07-31-2009, 10:07 AM
hmm, In most engines tsats only help engines get warmer, ive heard a lot of builders in forums say its absolutely nessesary in a 335 series enginez cuz it helps cool the back cyllinders..
People around here trash em due to the temp (100 degrees)... I myself experimented without one and ended up having air pockets in the rear cyllinders..

393clevor
08-01-2009, 06:37 AM
hmm, In most engines tsats only help engines get warmer


I found this... good read and keep in mind the 400 has a bypass system. I put a thermostat in yesterday but it was not a bypass tstat, it looked like a normal everyday tstat... I'm on the hunt this morning for the right one...
http://www.are.com.au/feat/techt/thermostat.htm

learn something new everyday!!!!!

393clevor
08-02-2009, 02:32 AM
It's late so I'll give you this to look at... Eric was more than happy with the motor, he's going to change the 205 transfer case for a 208 and that should keep the rpms up in the deep mud.

Just a note you have to use a bypass tstat in a 351M/400 or it wont cool properly and 3 out of 4 stores I went too sold the wrong one for a 351M/400, it was not a bypass.

<object width="425" height="344"><param name="movie" value="http://www.youtube.com/v/tW2Dq8qF1cw&hl=en&fs=1&"></param><param name="allowFullScreen" value="true"></param><param name="allowscriptaccess" value="always"></param><embed src="http://www.youtube.com/v/tW2Dq8qF1cw&hl=en&fs=1&" type="application/x-shockwave-flash" allowscriptaccess="always" allowfullscreen="true" width="425" height="344"></embed></object>

393clevor
08-02-2009, 10:12 AM
rest of the vids I took that day...

http://www.youtube.com/view_play_list?p=CA9282D39A0C6B51

TexasNomad
08-02-2009, 02:03 PM
<object width="425" height="344"><param name="movie" value="http://www.youtube.com/v/tW2Dq8qF1cw&hl=en&fs=1&"></param><param name="allowFullScreen" value="true"></param><param name="allowscriptaccess" value="always"></param><embed src="http://www.youtube.com/v/tW2Dq8qF1cw&hl=en&fs=1&" type="application/x-shockwave-flash" allowscriptaccess="always" allowfullscreen="true" width="425" height="344"></embed></object>

Wow! you built one hell of a beast :D

UNRULEE
08-02-2009, 06:06 PM
Good job! Nothing like the sound of a 400 at full throttle!!!

TexasNomad
08-02-2009, 06:10 PM
I think! i've made my dission! uhh Dicsision err dissension!!!!!!

I want a 400!! :D heck with this 700 lb 460 :D

393clevor
08-02-2009, 06:24 PM
I just pick one up, I got some 74 351C 2V heads just like the ones I used in this build, .030 351M pistons that my machinist buddy is going to let me mill down on his Bridgeport. Going to start looking for some pedestal mount roller rockers and intake. For a cam I'm going to step it up a few notches to 6500rpms. This will have to wait until I'm done with the 351W I'm building but for know I'm stocking parts for it.

hollenjoe
08-02-2009, 06:40 PM
It's late so I'll give you this to look at... Eric was more than happy with the motor, he's going to change the 205 transfer case for a 208 and that should keep the rpms up in the deep mud.

Just a note you have to use a bypass tstat in a 351M/400 or it wont cool properly and 3 out of 4 stores I went too sold the wrong one for a 351M/400, it was not a bypass.

<object width="425" height="344"><param name="movie" value="http://www.youtube.com/v/tW2Dq8qF1cw&hl=en&fs=1&"></param><param name="allowFullScreen" value="true"></param><param name="allowscriptaccess" value="always"></param><embed src="http://www.youtube.com/v/tW2Dq8qF1cw&hl=en&fs=1&" type="application/x-shockwave-flash" allowscriptaccess="always" allowfullscreen="true" width="425" height="344"></embed></object>

Yup, i read alot on the subject, they confuse windsor tstats with the bypass one because the reference number is almost identical:
windsor motorcraft rf # 1139
335 motorcraft rf # 139

see the mix up?

393clevor
08-02-2009, 06:44 PM
I sure do...........

393clevor
10-23-2009, 11:06 PM
i talked him into a Holley 750 big difference

<object width="425" height="344"><param name="movie" value="http://www.youtube.com/v/hyv7g5Rxl7I&hl=en&fs=1&"></param><param name="allowFullScreen" value="true"></param><param name="allowscriptaccess" value="always"></param><embed src="http://www.youtube.com/v/hyv7g5Rxl7I&hl=en&fs=1&" type="application/x-shockwave-flash" allowscriptaccess="always" allowfullscreen="true" width="425" height="344"></embed></object>

<object width="425" height="344"><param name="movie" value="http://www.youtube.com/v/VEFryZu5Saw&hl=en&fs=1&"></param><param name="allowFullScreen" value="true"></param><param name="allowscriptaccess" value="always"></param><embed src="http://www.youtube.com/v/VEFryZu5Saw&hl=en&fs=1&" type="application/x-shockwave-flash" allowscriptaccess="always" allowfullscreen="true" width="425" height="344"></embed></object>

Broke the front drive shaft...

money_pit
10-26-2009, 11:04 AM
Priming the oil system

<object width="425" height="344"><param name="movie" value="http://www.youtube.com/v/cPdi9DEkFGE&hl=en&fs=1&"></param><param name="allowFullScreen" value="true"></param><param name="allowscriptaccess" value="always"></param><embed src="http://www.youtube.com/v/cPdi9DEkFGE&hl=en&fs=1&" type="application/x-shockwave-flash" allowscriptaccess="always" allowfullscreen="true" width="425" height="344"></embed></object>


Here's another video of my 351Clevor.. In this video the system is dry I just added oil and started turning the drill (CCW). You can see how long it takes for the oil to reach the rockers.

<object width="425" height="344"><param name="movie" value="http://www.youtube.com/v/QZmd3l4AT58&hl=en&fs=1"></param><param name="allowFullScreen" value="true"></param><param name="allowscriptaccess" value="always"></param><embed src="http://www.youtube.com/v/QZmd3l4AT58&hl=en&fs=1" type="application/x-shockwave-flash" allowscriptaccess="always" allowfullscreen="true" width="425" height="344"></embed></object>

Your crank is not cross drilled so if you are not useing full groove main bearings you should turn the crank a cupple times to be sure every rod throw gets oil. Run the drill till you feel resistance, then turn the crank. Run it again then stop. Excessive priming will wash away all the assembly oil.

393clevor
10-28-2009, 05:42 AM
I like to make sure the rockers are getting oil, I lube everything real good never had a problem been doing it this way for years...