LEB Ben
Arrogant A-hole At-Large
This is a fairly in depth write-up and pictorial of how to get to the timing chain and replace it, with a few tips and tricks along the way. Not all my techniques used are necessarily 'proper' but they did get the job done. Keep in mind, this is on a 351M with A/C...but for the most part, most of the steps will be the same on a 360/390 and 429/460.
If you're anything like me, it's good to take some pics of the engine in it's original state and any areas you'll be working, so then you'll have an idea of what it's supposed to look like when you're done.
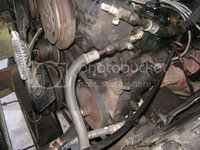
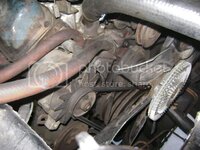
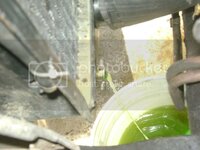
-I started with draining the radiator...don't forget guys, there's a pet cock to drain, alot less messy than just yanking the lower hose:
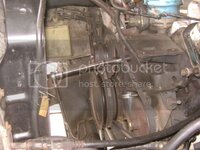
-Next, you'll want to remove your fan shroud (if you have one)...as well as the fan (the fan requires a 7/16 wrench), and you'll have something that looks like this (with A/C removed and idler pulley removed):
(For reinstall, place one bolt in the bottom slot of the fan spacer...that way you don't have to try and hold the fan in place)
-Next you'll want to remove the power steering pump (I just removed it from the block and rested it in the bay):
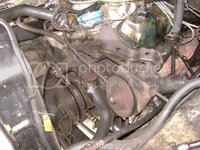
(Keep in mind to get the belt off of the PS pump, you need to loosen the 3nuts on the top side and one nut on the side of the bracket. At which time the pump will slide up and down in that bracket)
-Next comes the Alternator bracket:
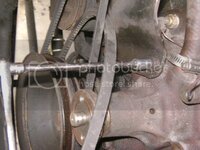
(Be sure to take a picture and consult that picture if you're unsure which wire goes where on the alternator...so you don't end up like me and fry your alt. and battery)
At this point in time, I still had my smog pump on, and I decided it was a good time to ditch it. In the picture, you'll notice the wrench to the back side...that's because the bolt went through the block and was secured with a nut:
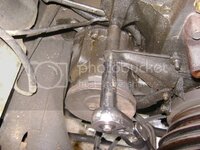
-Next, you'll want to remove the heater hose and the lower radiator hose from the water pump, and at this point, you should have something that looks like this:
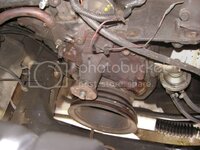
The next step was to remove the crankshaft pulley:
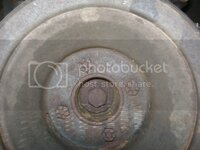
In order to get the bolt out, you could either use an impact, or stop the pulley from spinning (I chose the latter, but did have a 400lb guy pulling down on the pry bar)
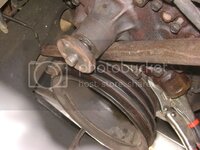
And now, you're down to the fuel pump (could have been done earlier, but waaaaay easier to get to now), damper, the pointer and the cover:
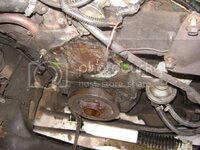
-Next...be SURE to use the right tool for the job. YOU NEED A HARMONIC BALANCER PULLER. I was stubborn and tried using an old flywheel puller and it put pulling pressure on the wrong areas, and gave me something like this:
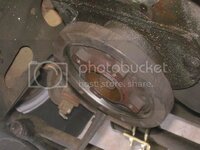
So I bought the right puller (only $16 and can be used for several other things as well).
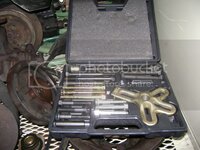
(My dad also saved my behind and brought my balancer to work, and it only took a 25,000 lb press to make it right again. So he saved me $100)
-Next...my cover was stuck on pretty good, so I needed to use a couple screw drivers to get under the gasket and pry it off. Be sure not to bend it, and remember there are also two dowel pins that it sits on. Once you get the cover off, it'll look like this:
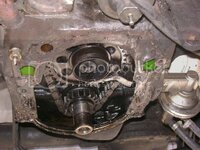
How about this chain stretch for ya:
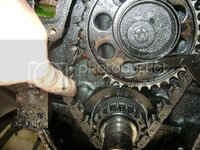
Now comes the toughest part of the WHOLE project, getting the cam gear and the crank sprocket off. For me, the crank sprocket moved easily, so I didn't really worry about it. The books all said to use long screw drivers and wedge them behind, and the sides of the cam gear, and try to pull it off. After toying around for 10-15 minutes that way and bending a couple screw drivers, I decided to just use a pry bar, and I wedged it on the underside...2-3 tugs later, the cam gear and crank sprocket came free:
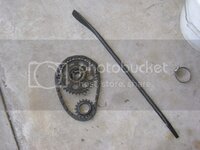
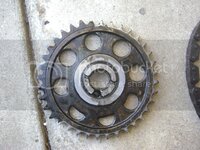
Upon further inspection, there appeared to be a few teeth sheered off, but the bigger concern was all the 'nylon' coating that was missing:
I had a feeling of where they went:
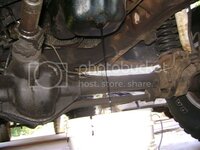
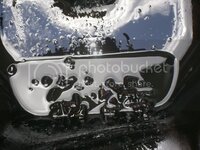
I was right:
Next, was time to scrape all the gaskets...this is what I used, and made light work of scraping:
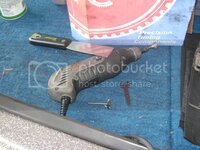
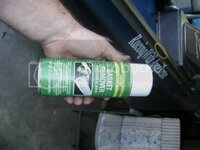
The spray worked great, and was the first time I ever used it...but it was amazing, made the old gaskets and silicone dissolve away. BE CAREFUL though, DO NOT get it on your skin...it DOES burn.
Now before you put the new chain on, you wanna be sure to get the #1 cylinder all the way to the top. It's easier to rotate the engine, if you take all the plugs out and have ZERO compression:
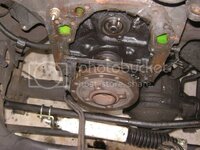
After all those missing teeth, making sure all the valves are opening and closing properly and trying to see if the push rods are still good:
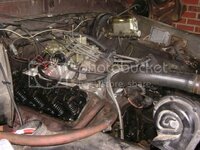
Sliding the new timing set on was pretty easy, you just have to make sure you have the gear and sprocket don't get diagonal. Also, don't forget about the keyway on the crank, and the tab on the back side of the eccentric:
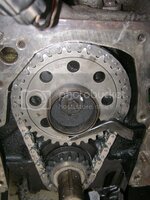
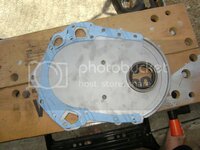
Now before you put the timing cover back on, make sure it's perfectly clean, because it seal to the block and the water pump (I figured I was in that far, and opted to buy a new one from JBG). I bead blasted mine. I also put a new seal in it too. I dunno how easily the seal was supposed to come out, but it took a 1,500lb press to get it outta there:
Then, you just go back in the reverse order and start putting things back together, remembering to tighten things to proper torque specs. Example...I was taken away from the job in the middle of the water pump...so all the bolts were just finger tight...when I got back to the project, I forgot to torque them all down, and threw everything back together...So when I went to start it for the first time, coolant poured out from everywhere. So I had tear back down to the water pump and do it right.
Ford forum
If you're anything like me, it's good to take some pics of the engine in it's original state and any areas you'll be working, so then you'll have an idea of what it's supposed to look like when you're done.


-I started with draining the radiator...don't forget guys, there's a pet cock to drain, alot less messy than just yanking the lower hose:

-Next, you'll want to remove your fan shroud (if you have one)...as well as the fan (the fan requires a 7/16 wrench), and you'll have something that looks like this (with A/C removed and idler pulley removed):

(For reinstall, place one bolt in the bottom slot of the fan spacer...that way you don't have to try and hold the fan in place)
-Next you'll want to remove the power steering pump (I just removed it from the block and rested it in the bay):

(Keep in mind to get the belt off of the PS pump, you need to loosen the 3nuts on the top side and one nut on the side of the bracket. At which time the pump will slide up and down in that bracket)
-Next comes the Alternator bracket:

(Be sure to take a picture and consult that picture if you're unsure which wire goes where on the alternator...so you don't end up like me and fry your alt. and battery)
At this point in time, I still had my smog pump on, and I decided it was a good time to ditch it. In the picture, you'll notice the wrench to the back side...that's because the bolt went through the block and was secured with a nut:

-Next, you'll want to remove the heater hose and the lower radiator hose from the water pump, and at this point, you should have something that looks like this:

The next step was to remove the crankshaft pulley:

In order to get the bolt out, you could either use an impact, or stop the pulley from spinning (I chose the latter, but did have a 400lb guy pulling down on the pry bar)

And now, you're down to the fuel pump (could have been done earlier, but waaaaay easier to get to now), damper, the pointer and the cover:

-Next...be SURE to use the right tool for the job. YOU NEED A HARMONIC BALANCER PULLER. I was stubborn and tried using an old flywheel puller and it put pulling pressure on the wrong areas, and gave me something like this:

So I bought the right puller (only $16 and can be used for several other things as well).

(My dad also saved my behind and brought my balancer to work, and it only took a 25,000 lb press to make it right again. So he saved me $100)
-Next...my cover was stuck on pretty good, so I needed to use a couple screw drivers to get under the gasket and pry it off. Be sure not to bend it, and remember there are also two dowel pins that it sits on. Once you get the cover off, it'll look like this:

How about this chain stretch for ya:

Now comes the toughest part of the WHOLE project, getting the cam gear and the crank sprocket off. For me, the crank sprocket moved easily, so I didn't really worry about it. The books all said to use long screw drivers and wedge them behind, and the sides of the cam gear, and try to pull it off. After toying around for 10-15 minutes that way and bending a couple screw drivers, I decided to just use a pry bar, and I wedged it on the underside...2-3 tugs later, the cam gear and crank sprocket came free:

Upon further inspection, there appeared to be a few teeth sheered off, but the bigger concern was all the 'nylon' coating that was missing:

I had a feeling of where they went:

I was right:

Next, was time to scrape all the gaskets...this is what I used, and made light work of scraping:


The spray worked great, and was the first time I ever used it...but it was amazing, made the old gaskets and silicone dissolve away. BE CAREFUL though, DO NOT get it on your skin...it DOES burn.
Now before you put the new chain on, you wanna be sure to get the #1 cylinder all the way to the top. It's easier to rotate the engine, if you take all the plugs out and have ZERO compression:

After all those missing teeth, making sure all the valves are opening and closing properly and trying to see if the push rods are still good:

Sliding the new timing set on was pretty easy, you just have to make sure you have the gear and sprocket don't get diagonal. Also, don't forget about the keyway on the crank, and the tab on the back side of the eccentric:

Now before you put the timing cover back on, make sure it's perfectly clean, because it seal to the block and the water pump (I figured I was in that far, and opted to buy a new one from JBG). I bead blasted mine. I also put a new seal in it too. I dunno how easily the seal was supposed to come out, but it took a 1,500lb press to get it outta there:

Then, you just go back in the reverse order and start putting things back together, remembering to tighten things to proper torque specs. Example...I was taken away from the job in the middle of the water pump...so all the bolts were just finger tight...when I got back to the project, I forgot to torque them all down, and threw everything back together...So when I went to start it for the first time, coolant poured out from everywhere. So I had tear back down to the water pump and do it right.
Ford forum
Last edited by a moderator:


